How to install an AI Chatbot to Whatsapp
Automate replies, manage conversations, and deliver instant support by connecting your AI chatbot with WhatsApp.
This integration helps you streamline communication and make WhatsApp faster, smarter, and more responsive to your audience.
Before we get started, you'll need to set up your AI chatbot (Agent). Here's a quick guide to set everything up:
- Create an account.
- Once you're logged in, click Create Agent from the Agents tab.
- Fill in your agent's information and click Create.
- Go to your newly created agent.
- Add a Knowledge Base to your agent.
(This is the source of your agent's knowledge. Here you can add your business website or documents) - Improve your agent's responses by simulating conversations in Playground, revising its responses in Chat History, and viewing the revisions in Training.
- (Optional) Add a skill, like scheduling calendar events or escalating concerns to human agents, in the Skills tab.
And you're done. You now have an AI chatbot trained with your business' content. It's time to connect it with your Whatsapp account.
Note: You will need a WhatsApp Business account connected to a Meta Business Manager account to continue.
How to set up a WhatsApp business account
Before starting, you'll need:
- A Meta Business Manager account (business.facebook.com).
- Your business must be verified in Meta Business Manager to get full access. Have legal business info ready (legal name, address, website, and business documents).
- A phone number that is not already registered on WhatsApp (must receive SMS or calls for verification).
-
Create / log in to Meta Business Manager
Go to business.facebook.com and set up an account for your business.
-
Verify your business in Meta (Optional)
In Meta Business Suite, go to Security Center → Start verification. You’ll submit documents (business registration, tax docs, or official utility bills depending on your region). Approval may take days. Without verification you can still create a WABA but you’ll be limited. -
Create a WhatsApp Business Account (WABA)
In Meta Business Suite, go to Settings → Accounts → WhatsApp Accounts → Add → Create your WABA. This is the account that represents your business on the WhatsApp Business Platform.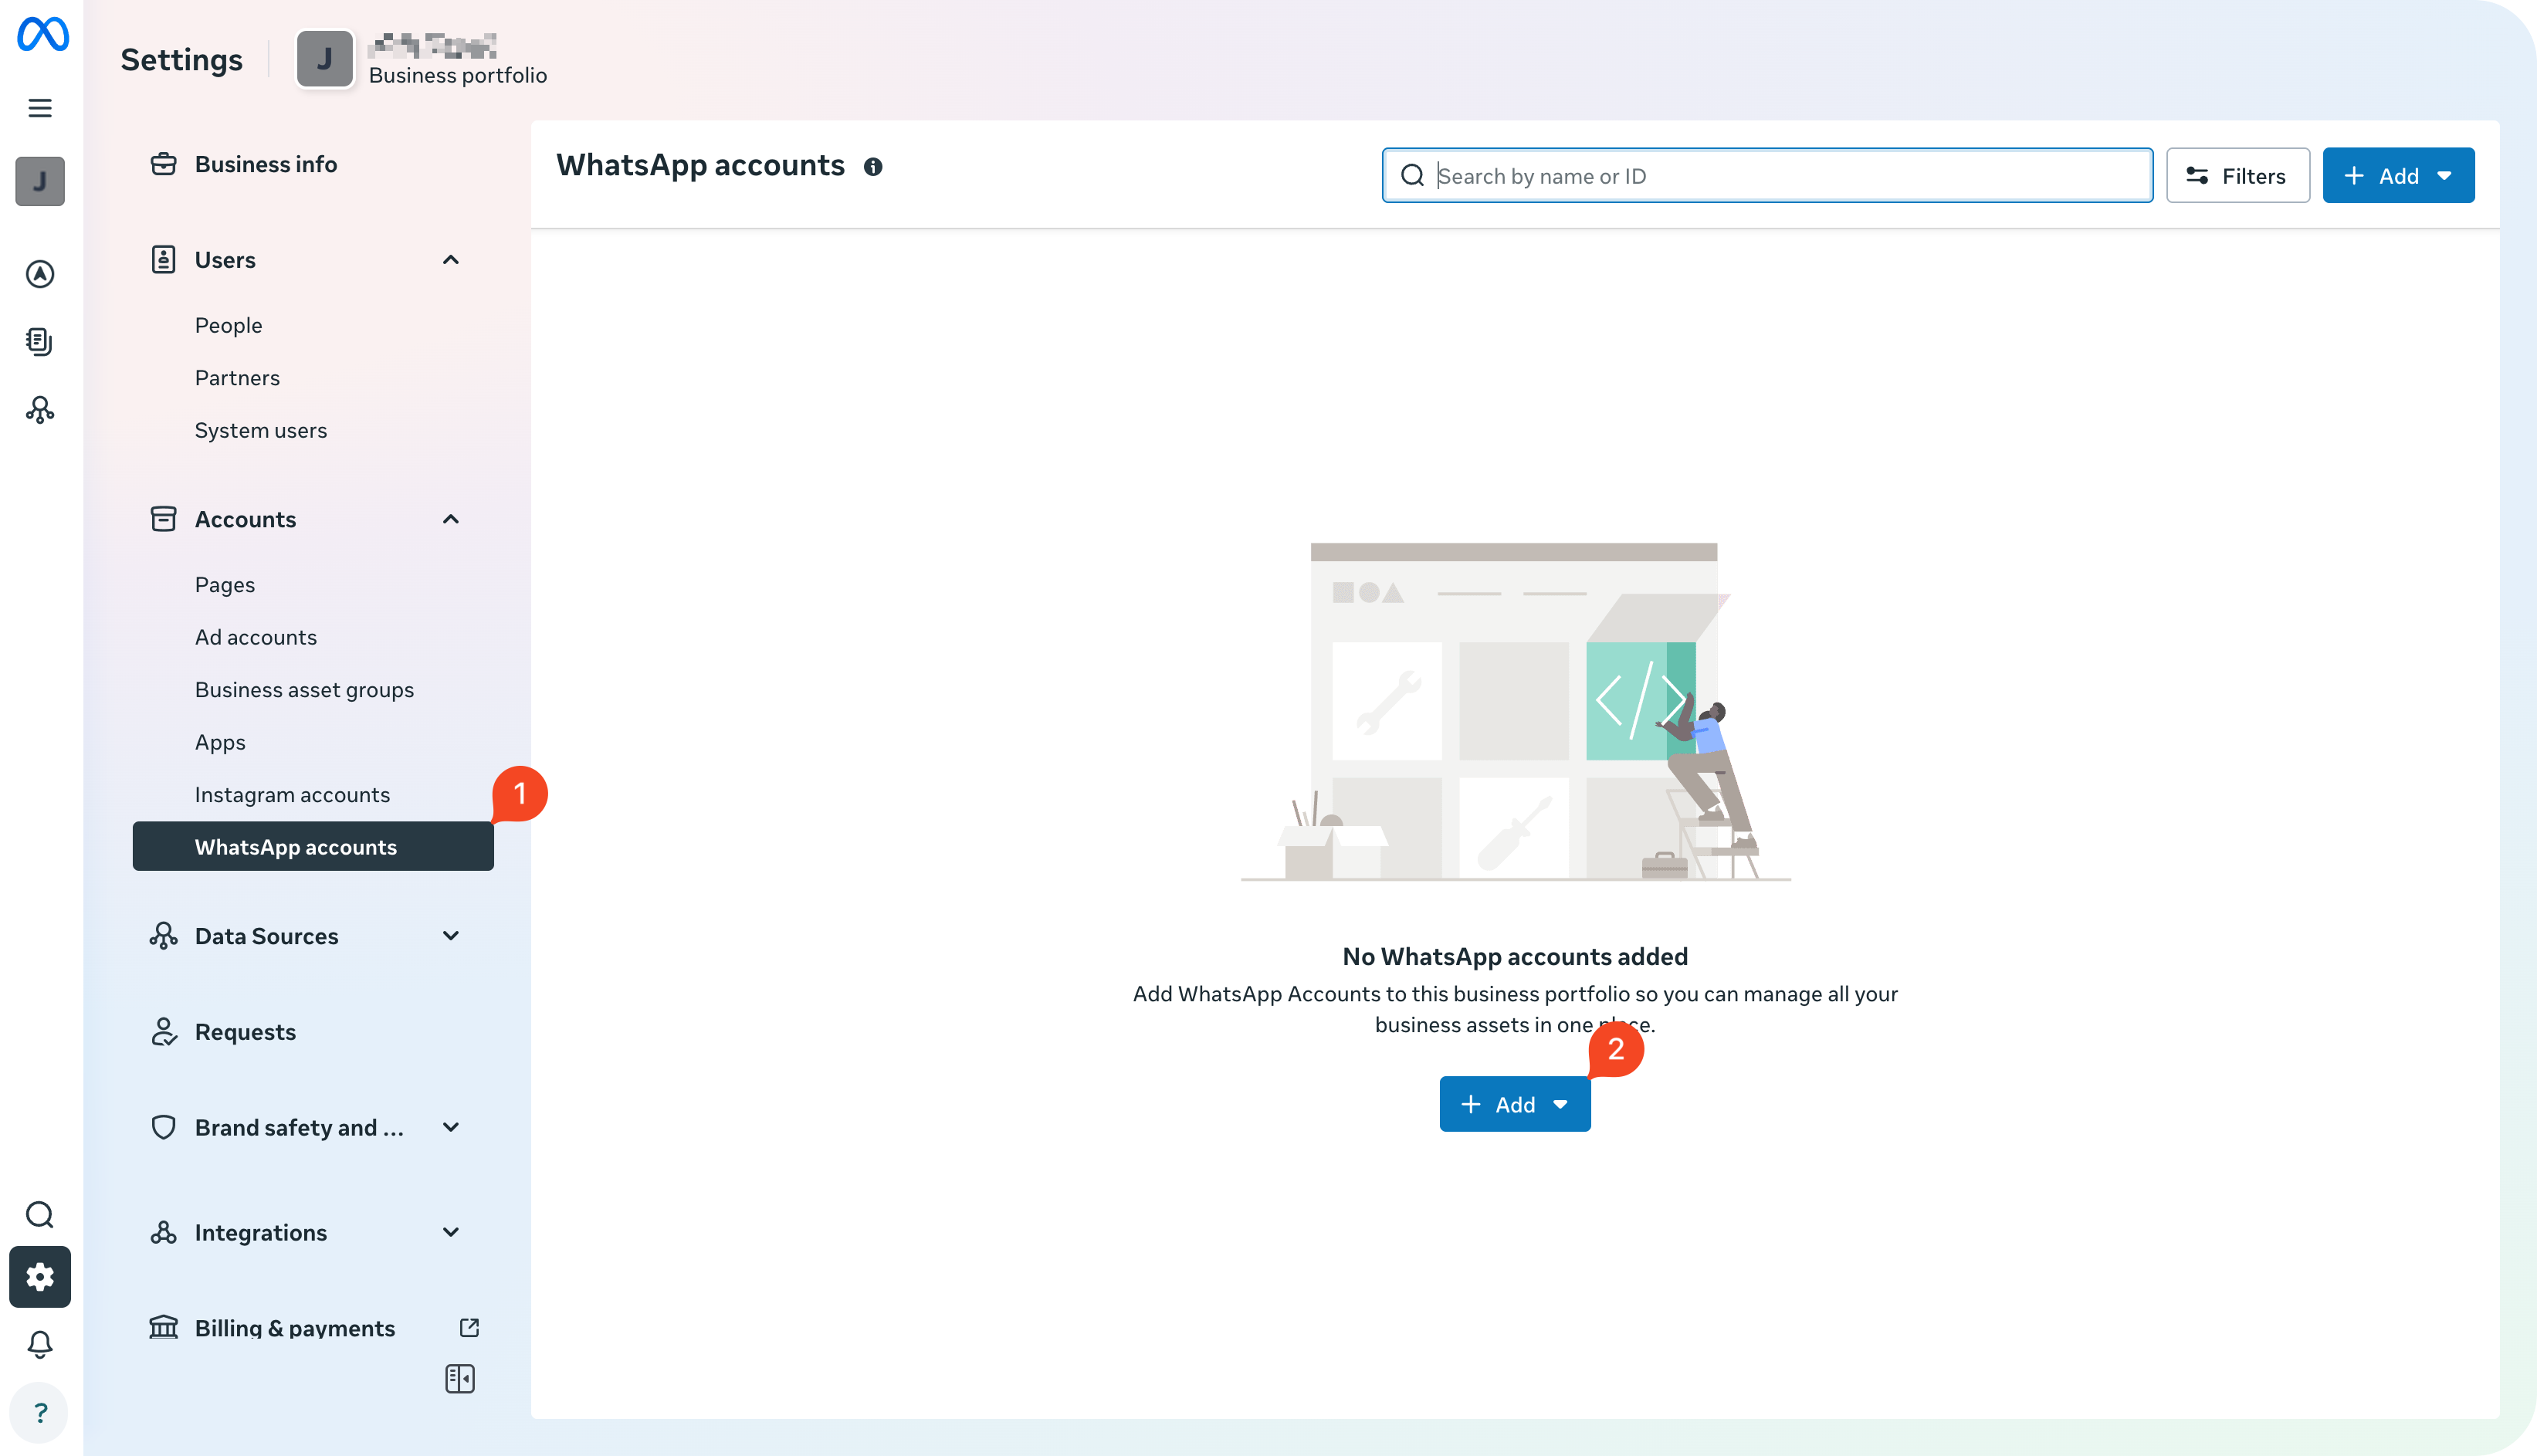
-
Register and verify your phone number
In the WABA settings add the phone number you’ll use; you’ll verify it with an SMS or voice call. The number must not be currently used by WhatsApp. Follow the verification prompts in Business Manager or your BSP portal.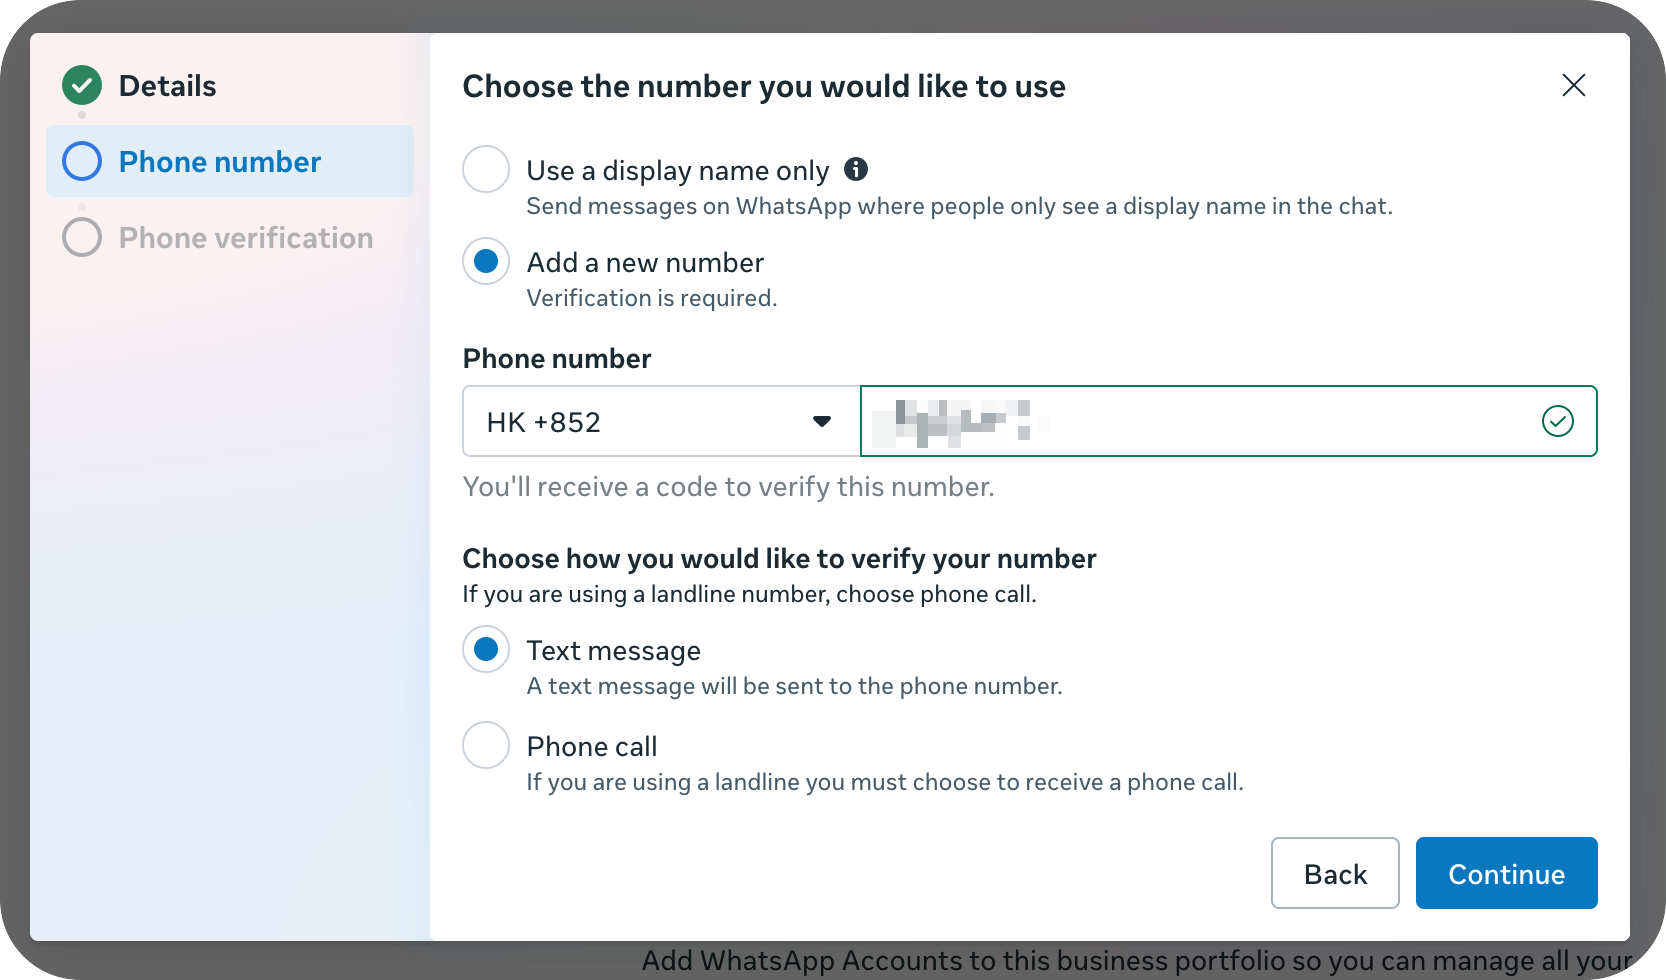
-
Submit your display name for approval (Optional)
Choose a display name for your WhatsApp. Display name approval is a separate review.
How to install AI chatbots to WhatsApp business accounts
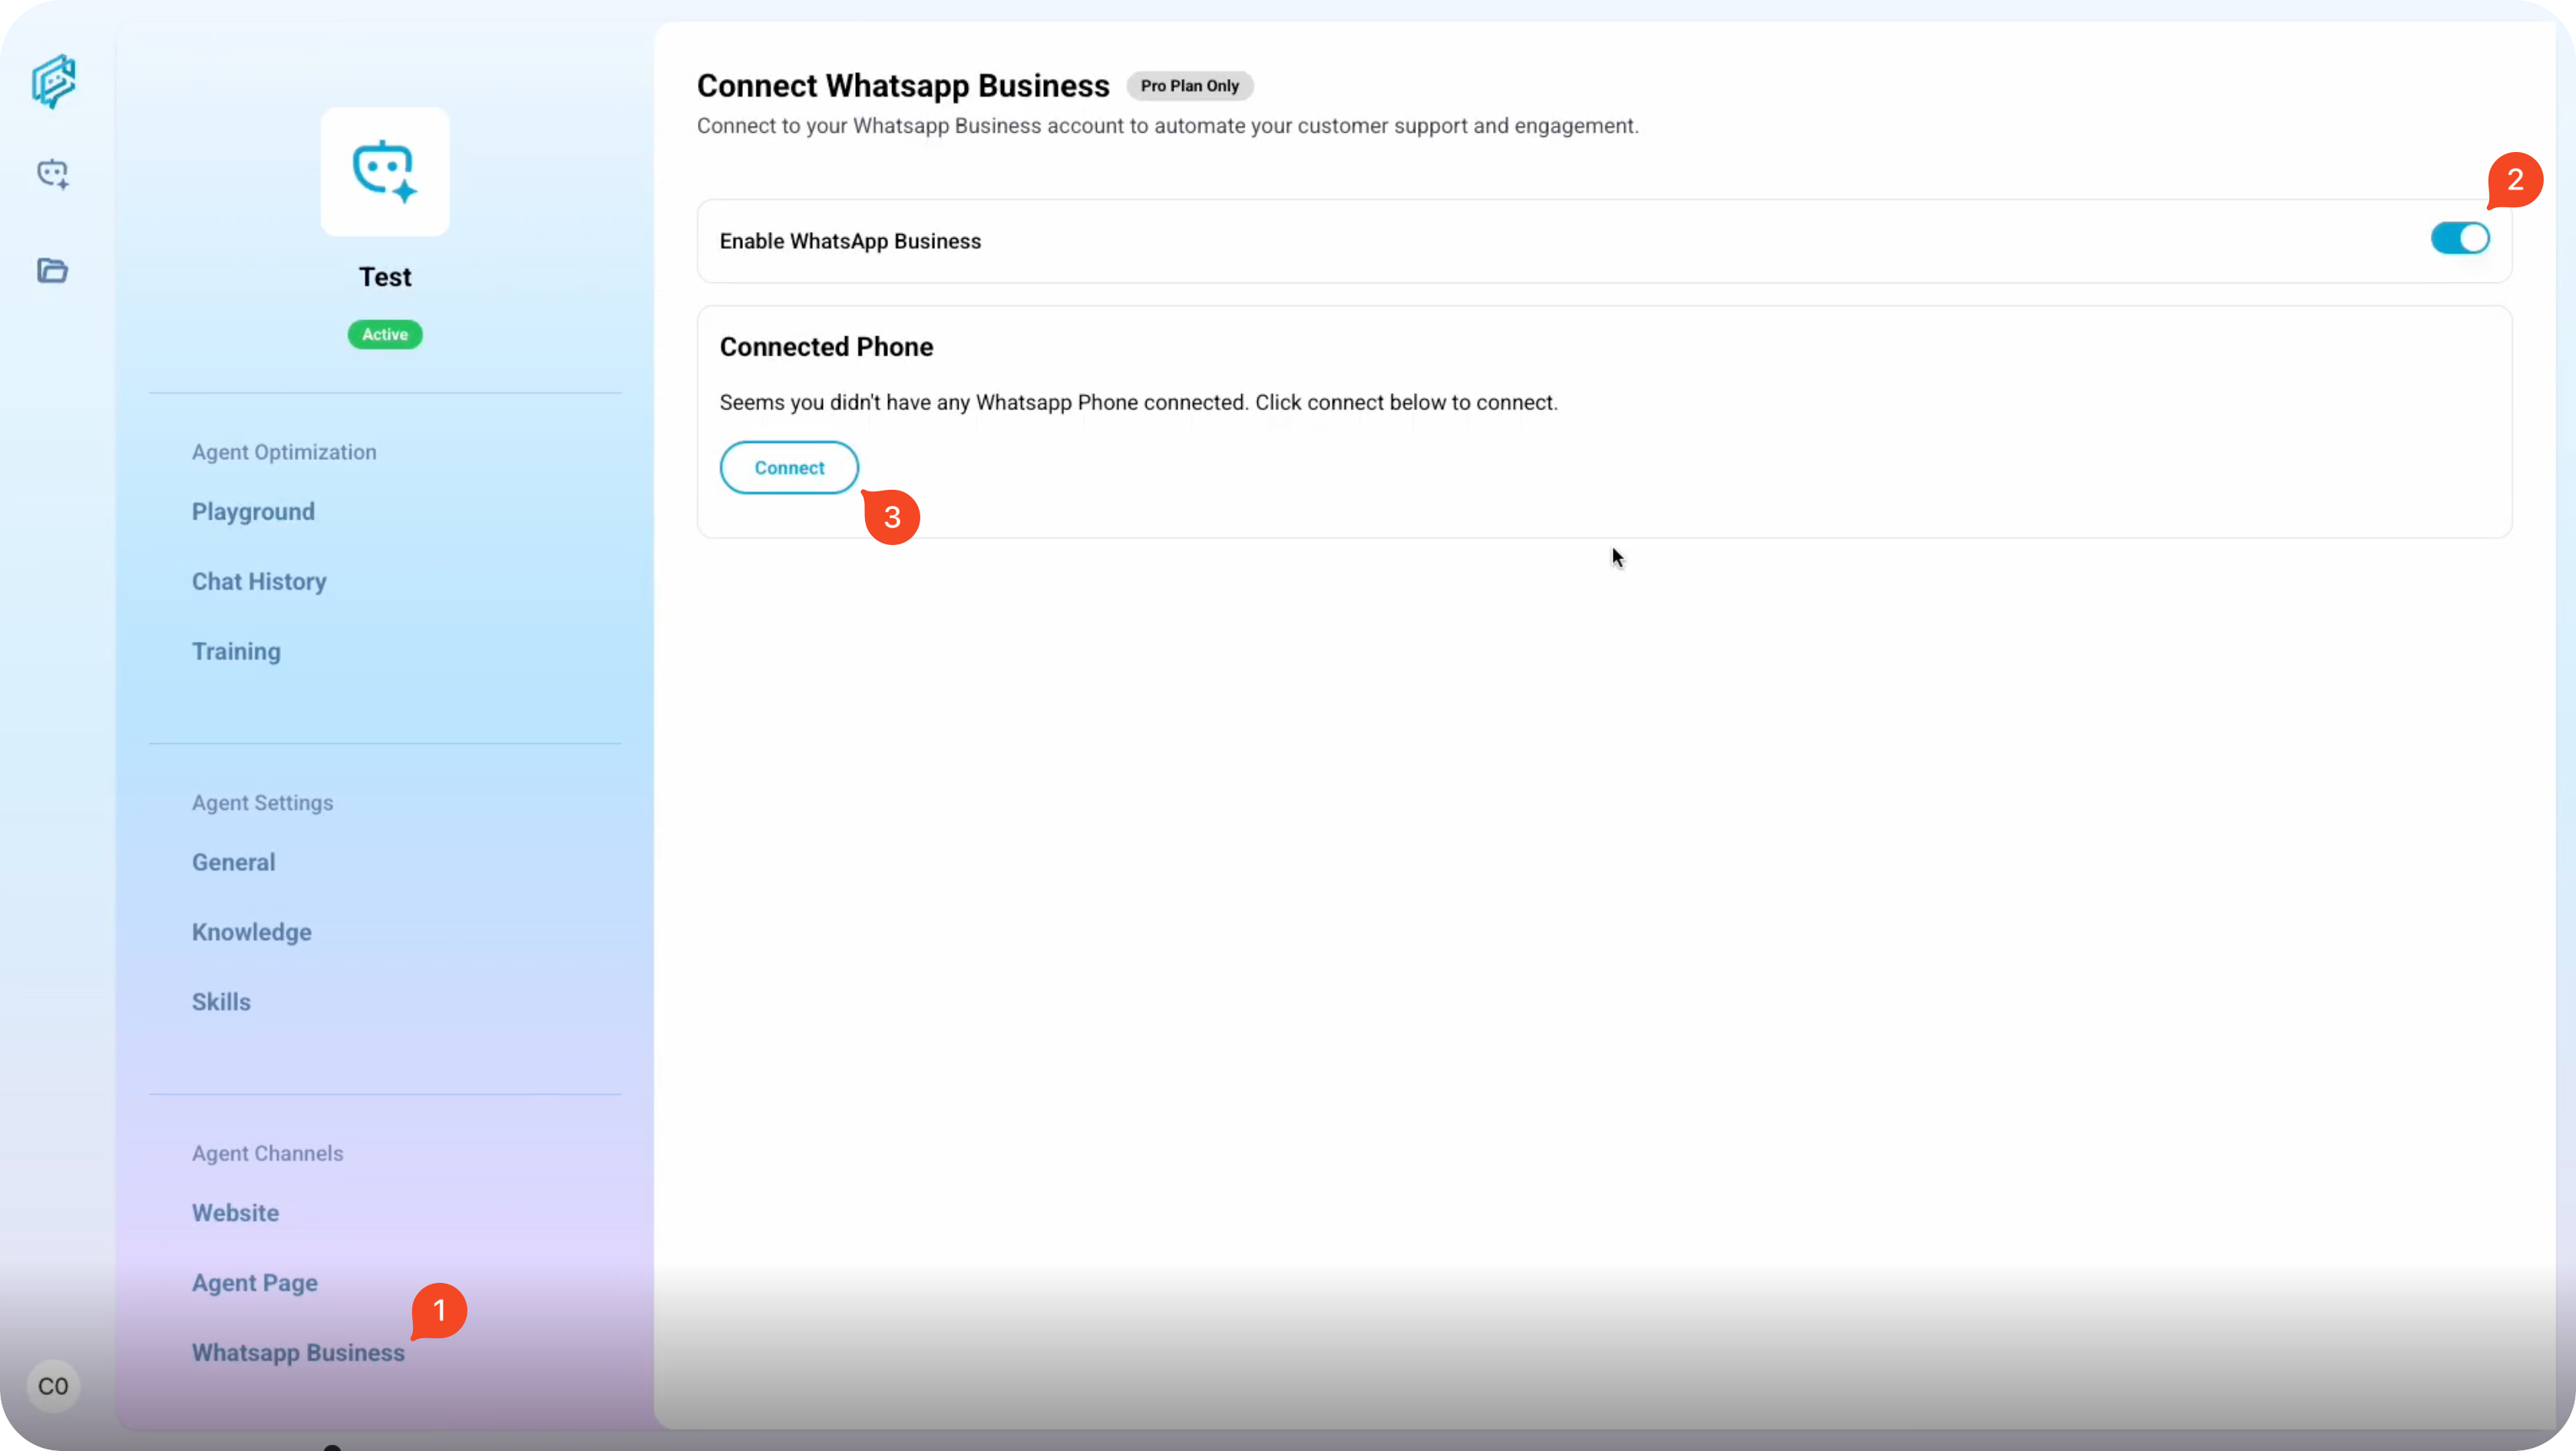
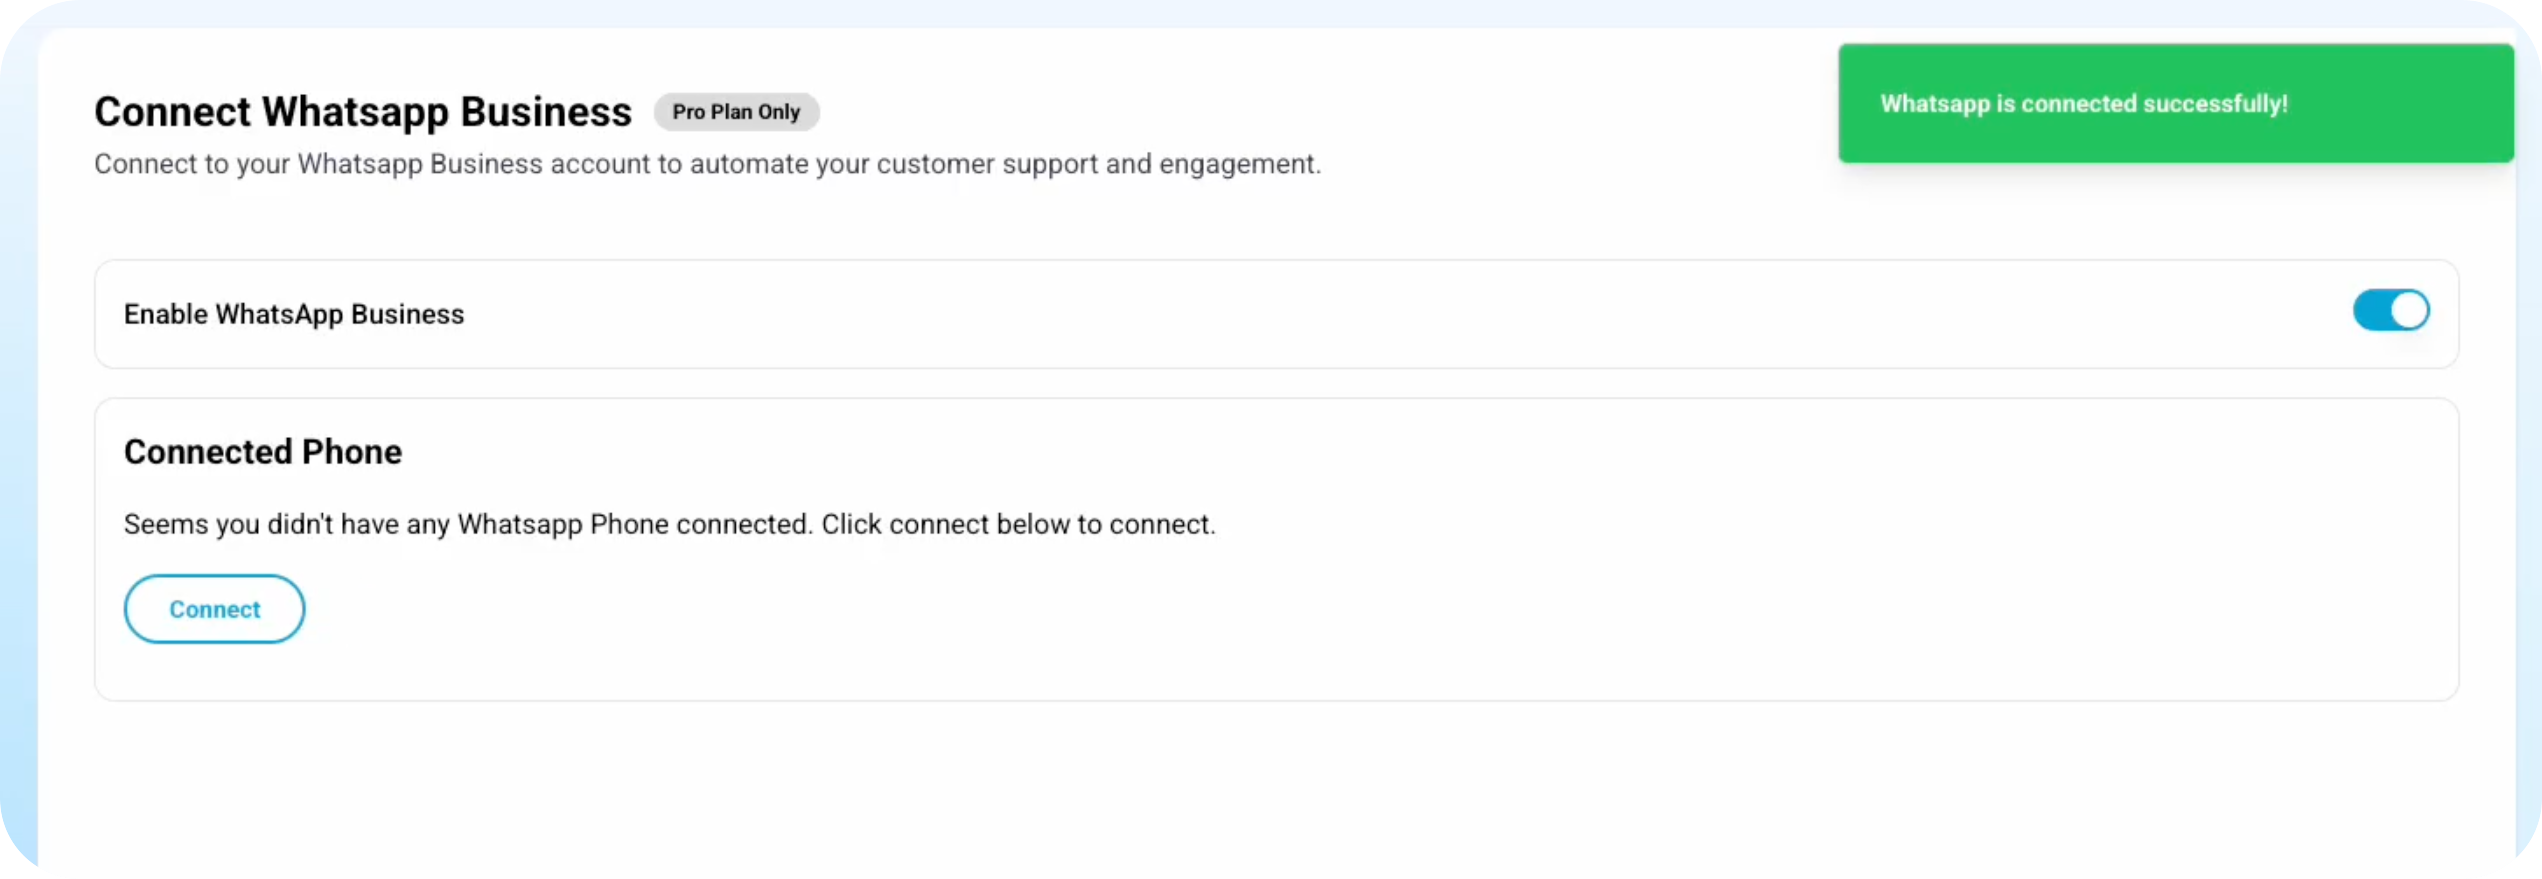
- Head to the WhatsApp Business tab from the ChatAgents sidebar.
- Enable WhatsApp Business.
- Click Connect under Connected Phone.
- Log in using your Facebook business account.
- Continue with the integration process till you reach the Connect confirmation page and click Finish.
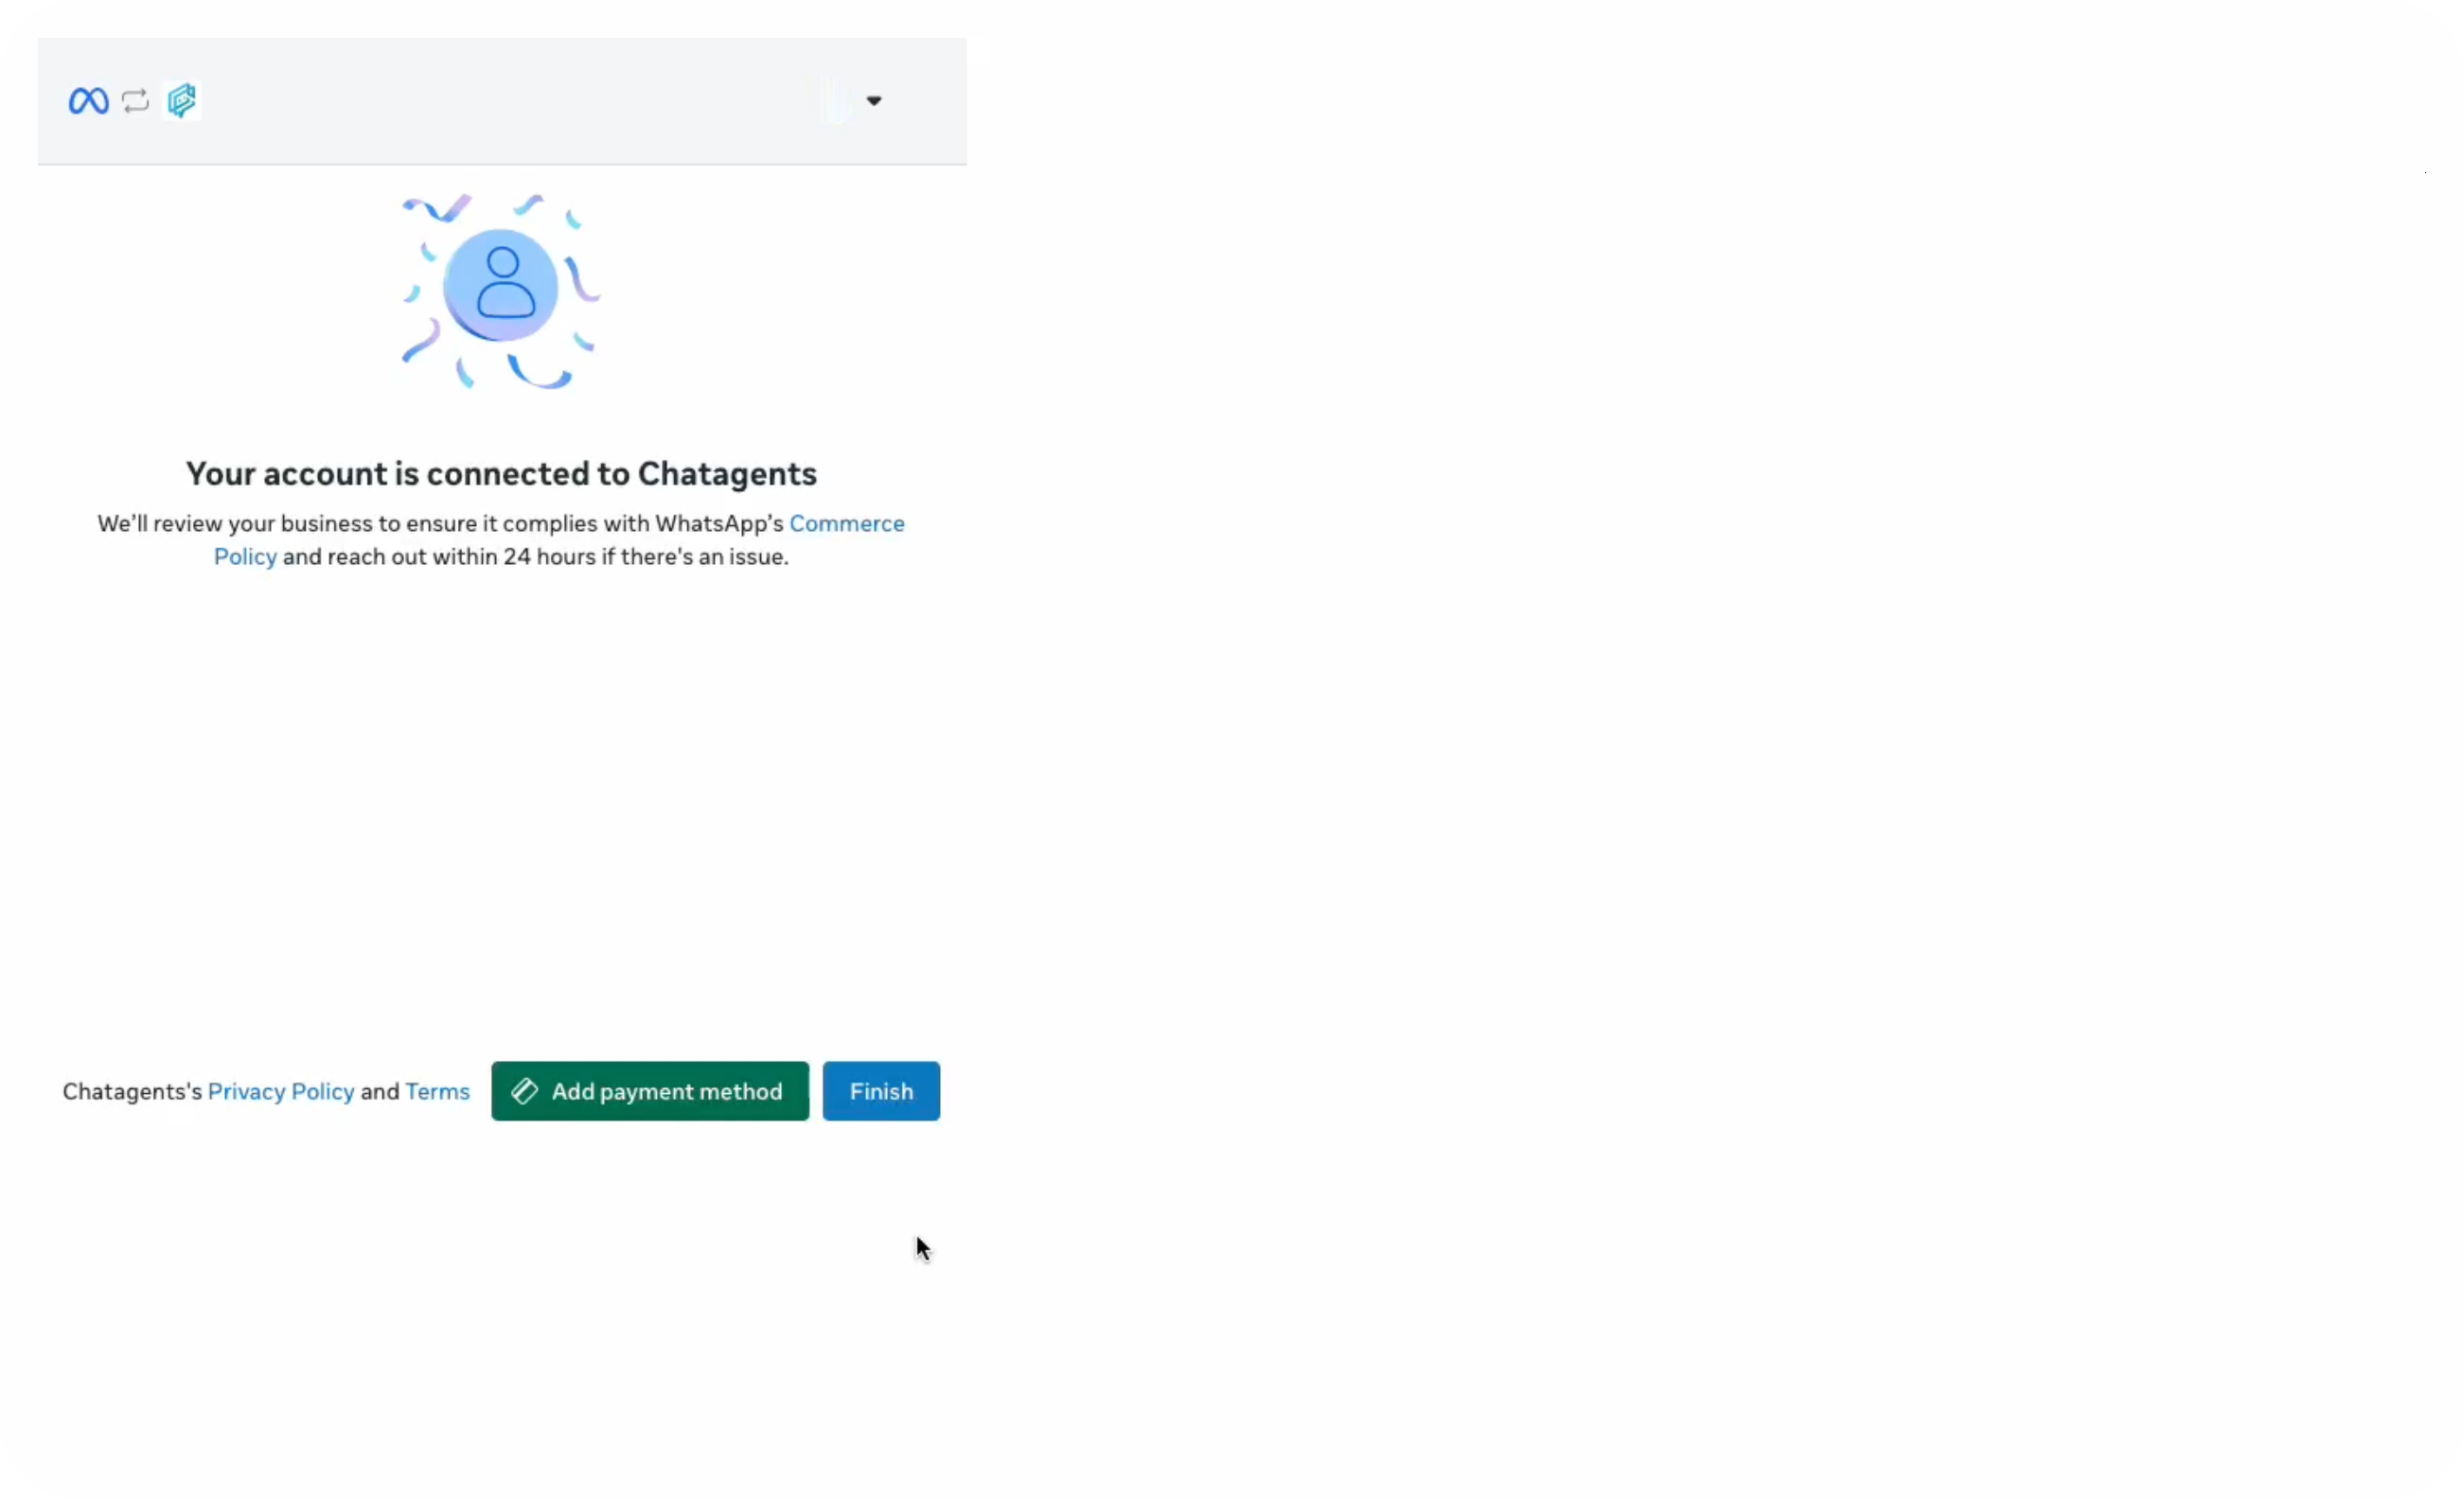
- Once you're redirected back to ChatAgents, wait a few seconds for the confirmation of your WhatsApp integration.
Congratulations, your AI chatbot is now integrated with your WhatsApp business account. Test it out by simulating a conversation on your device.
You're all set.
Having issues? Reach us at support@chatagents.io or browse more articles in our Help Centre.