Getting started with Chatagents
Learn to create your first AI chatbot with these 4 steps.
Sign up for an account
Creating an AI-powered chatbot involves training it with your data.
To keep your data private and secure, we require all users to register before getting started,
1. Set up your AI chatbot
First thing's first, let's build the foundations of your chatbot.
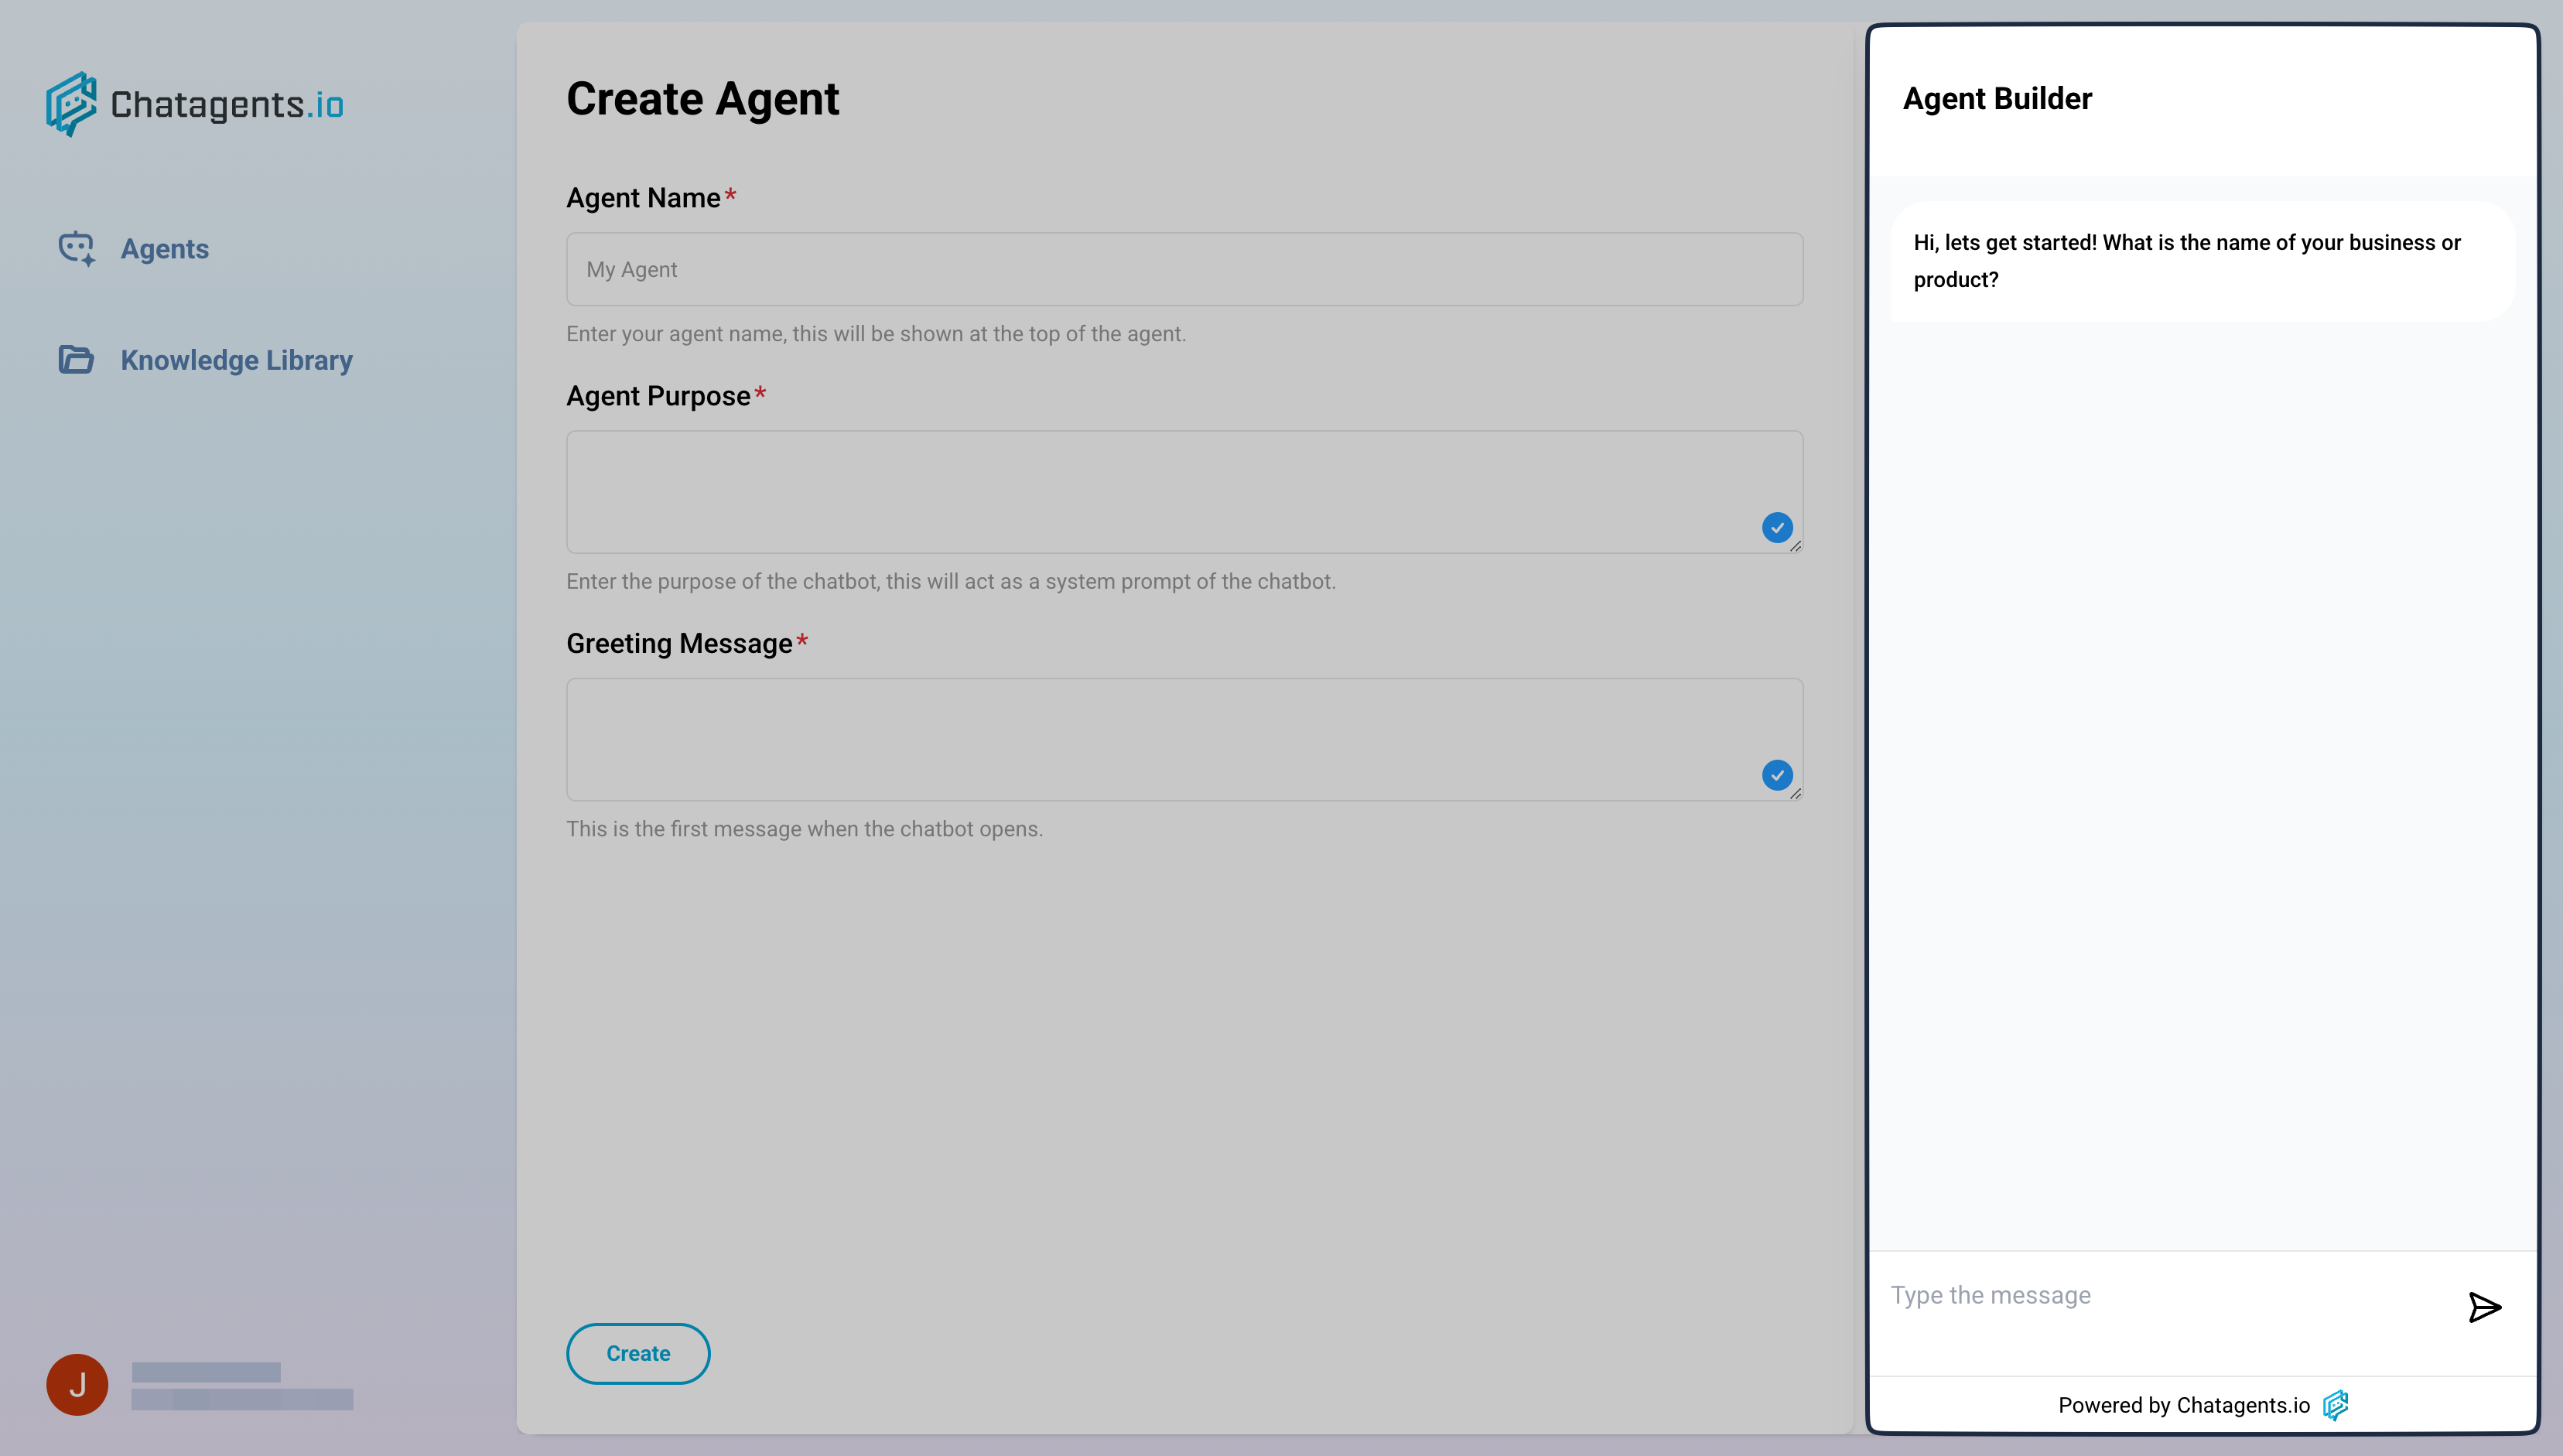
Method 1: Fill In The Fields

To get started:
- Fill in these fields at the Create Agent page:
- Agent Name: What you want your chatbot to be called.
- Agent Purpose: How your chatbot responds. Here you can clarify its personality, writing style, behaviors, function, etc.
- Greeting Message: The first message users will see.
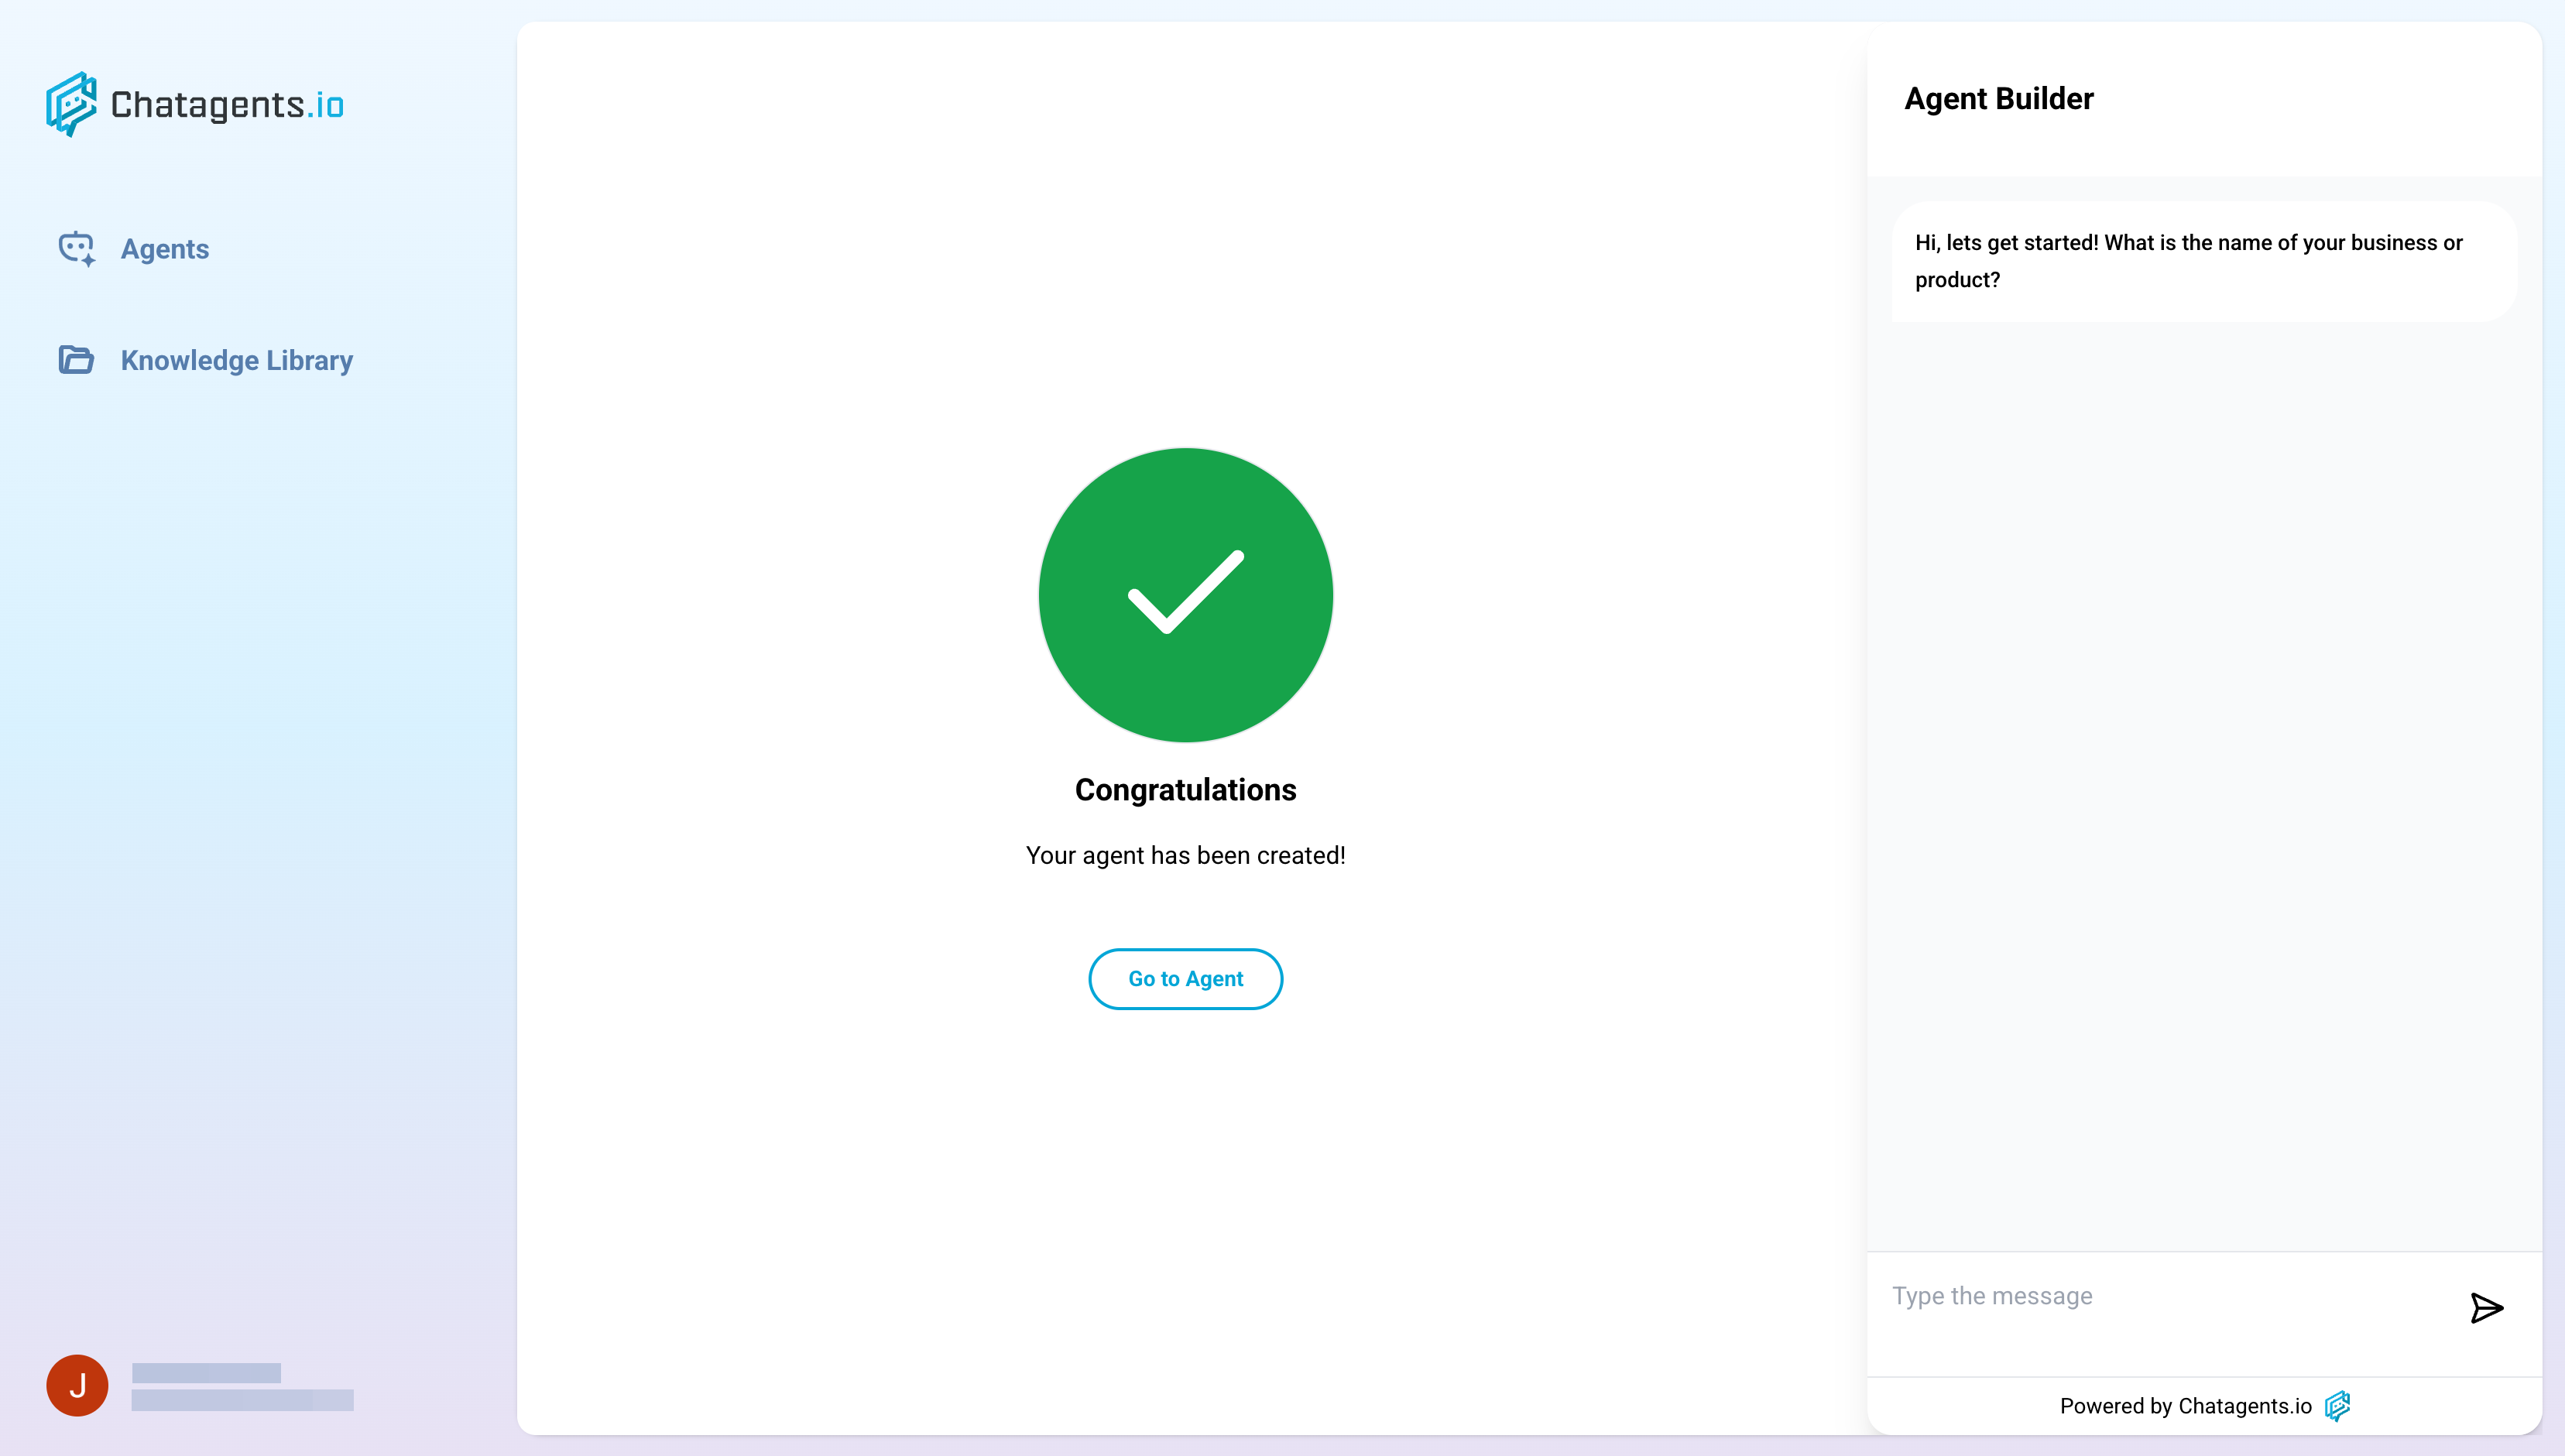
- Click Create.
- Once your Agent's been created, click Go to Agent.
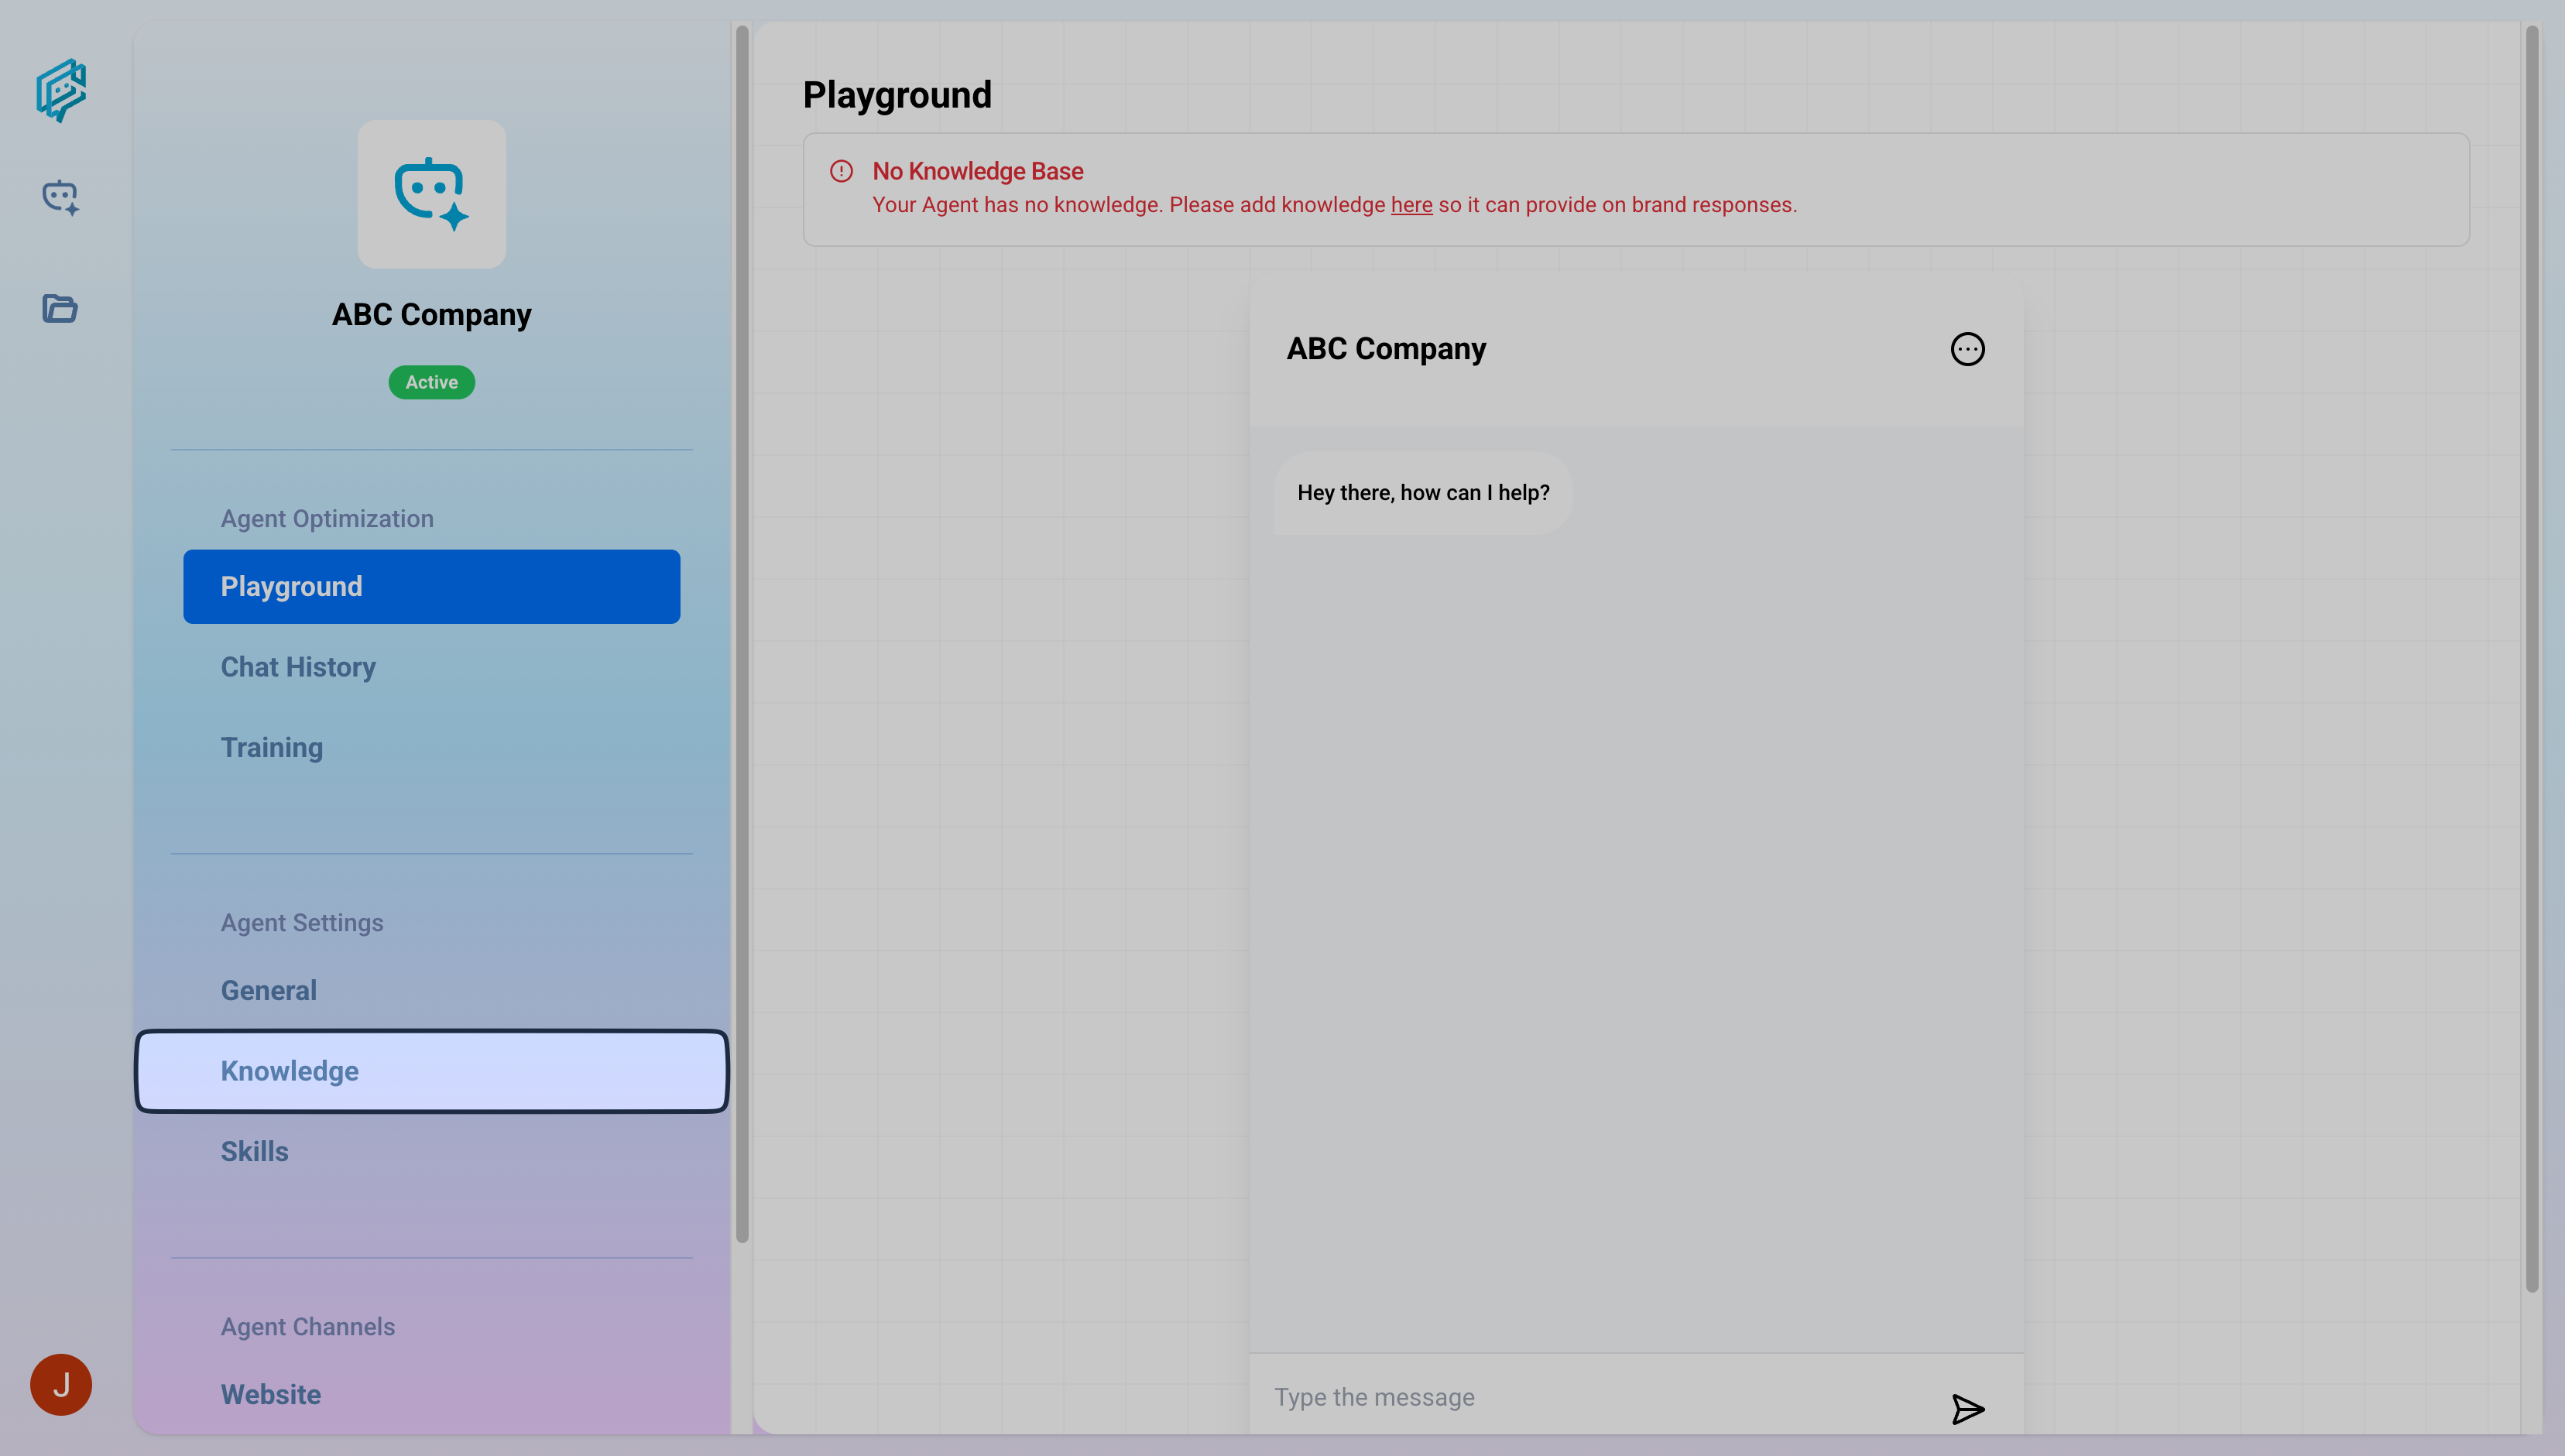
- Now that you've built the foundations of your chatbot, it's time to add a data source or knowledge base for your AI.
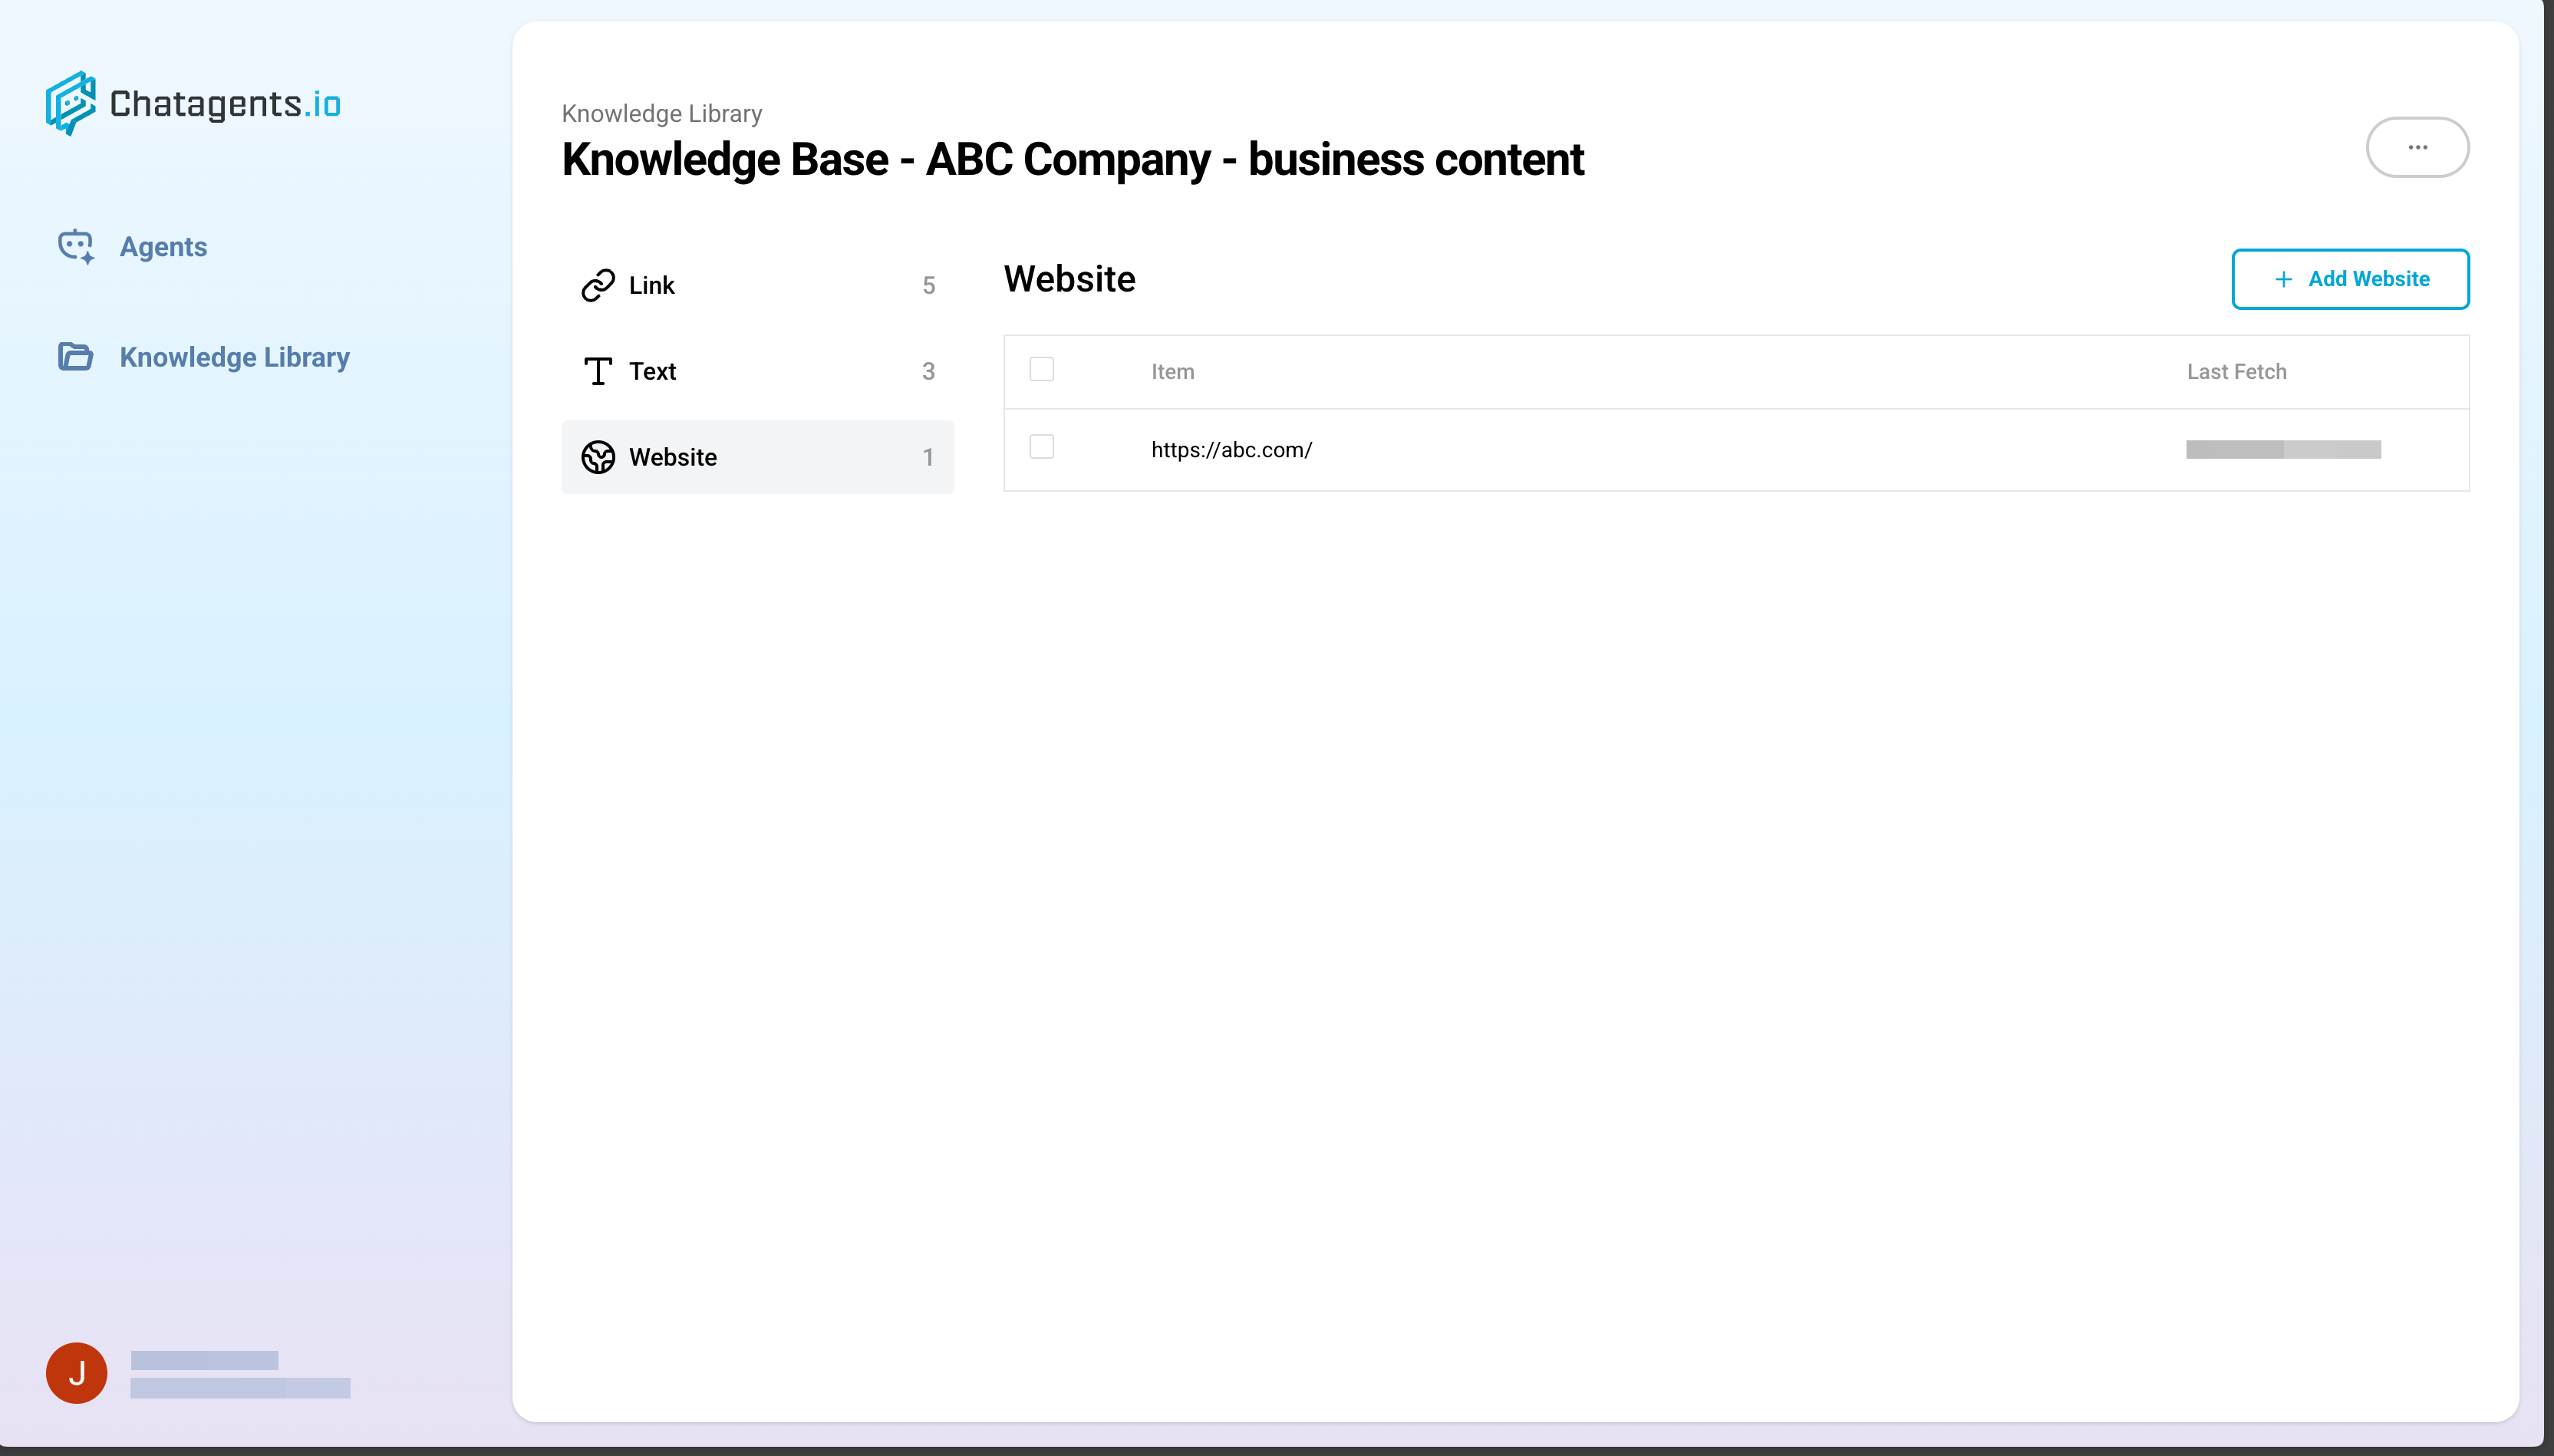
- Visit the Knowledge page.
- Click Create new Knowledge Base.
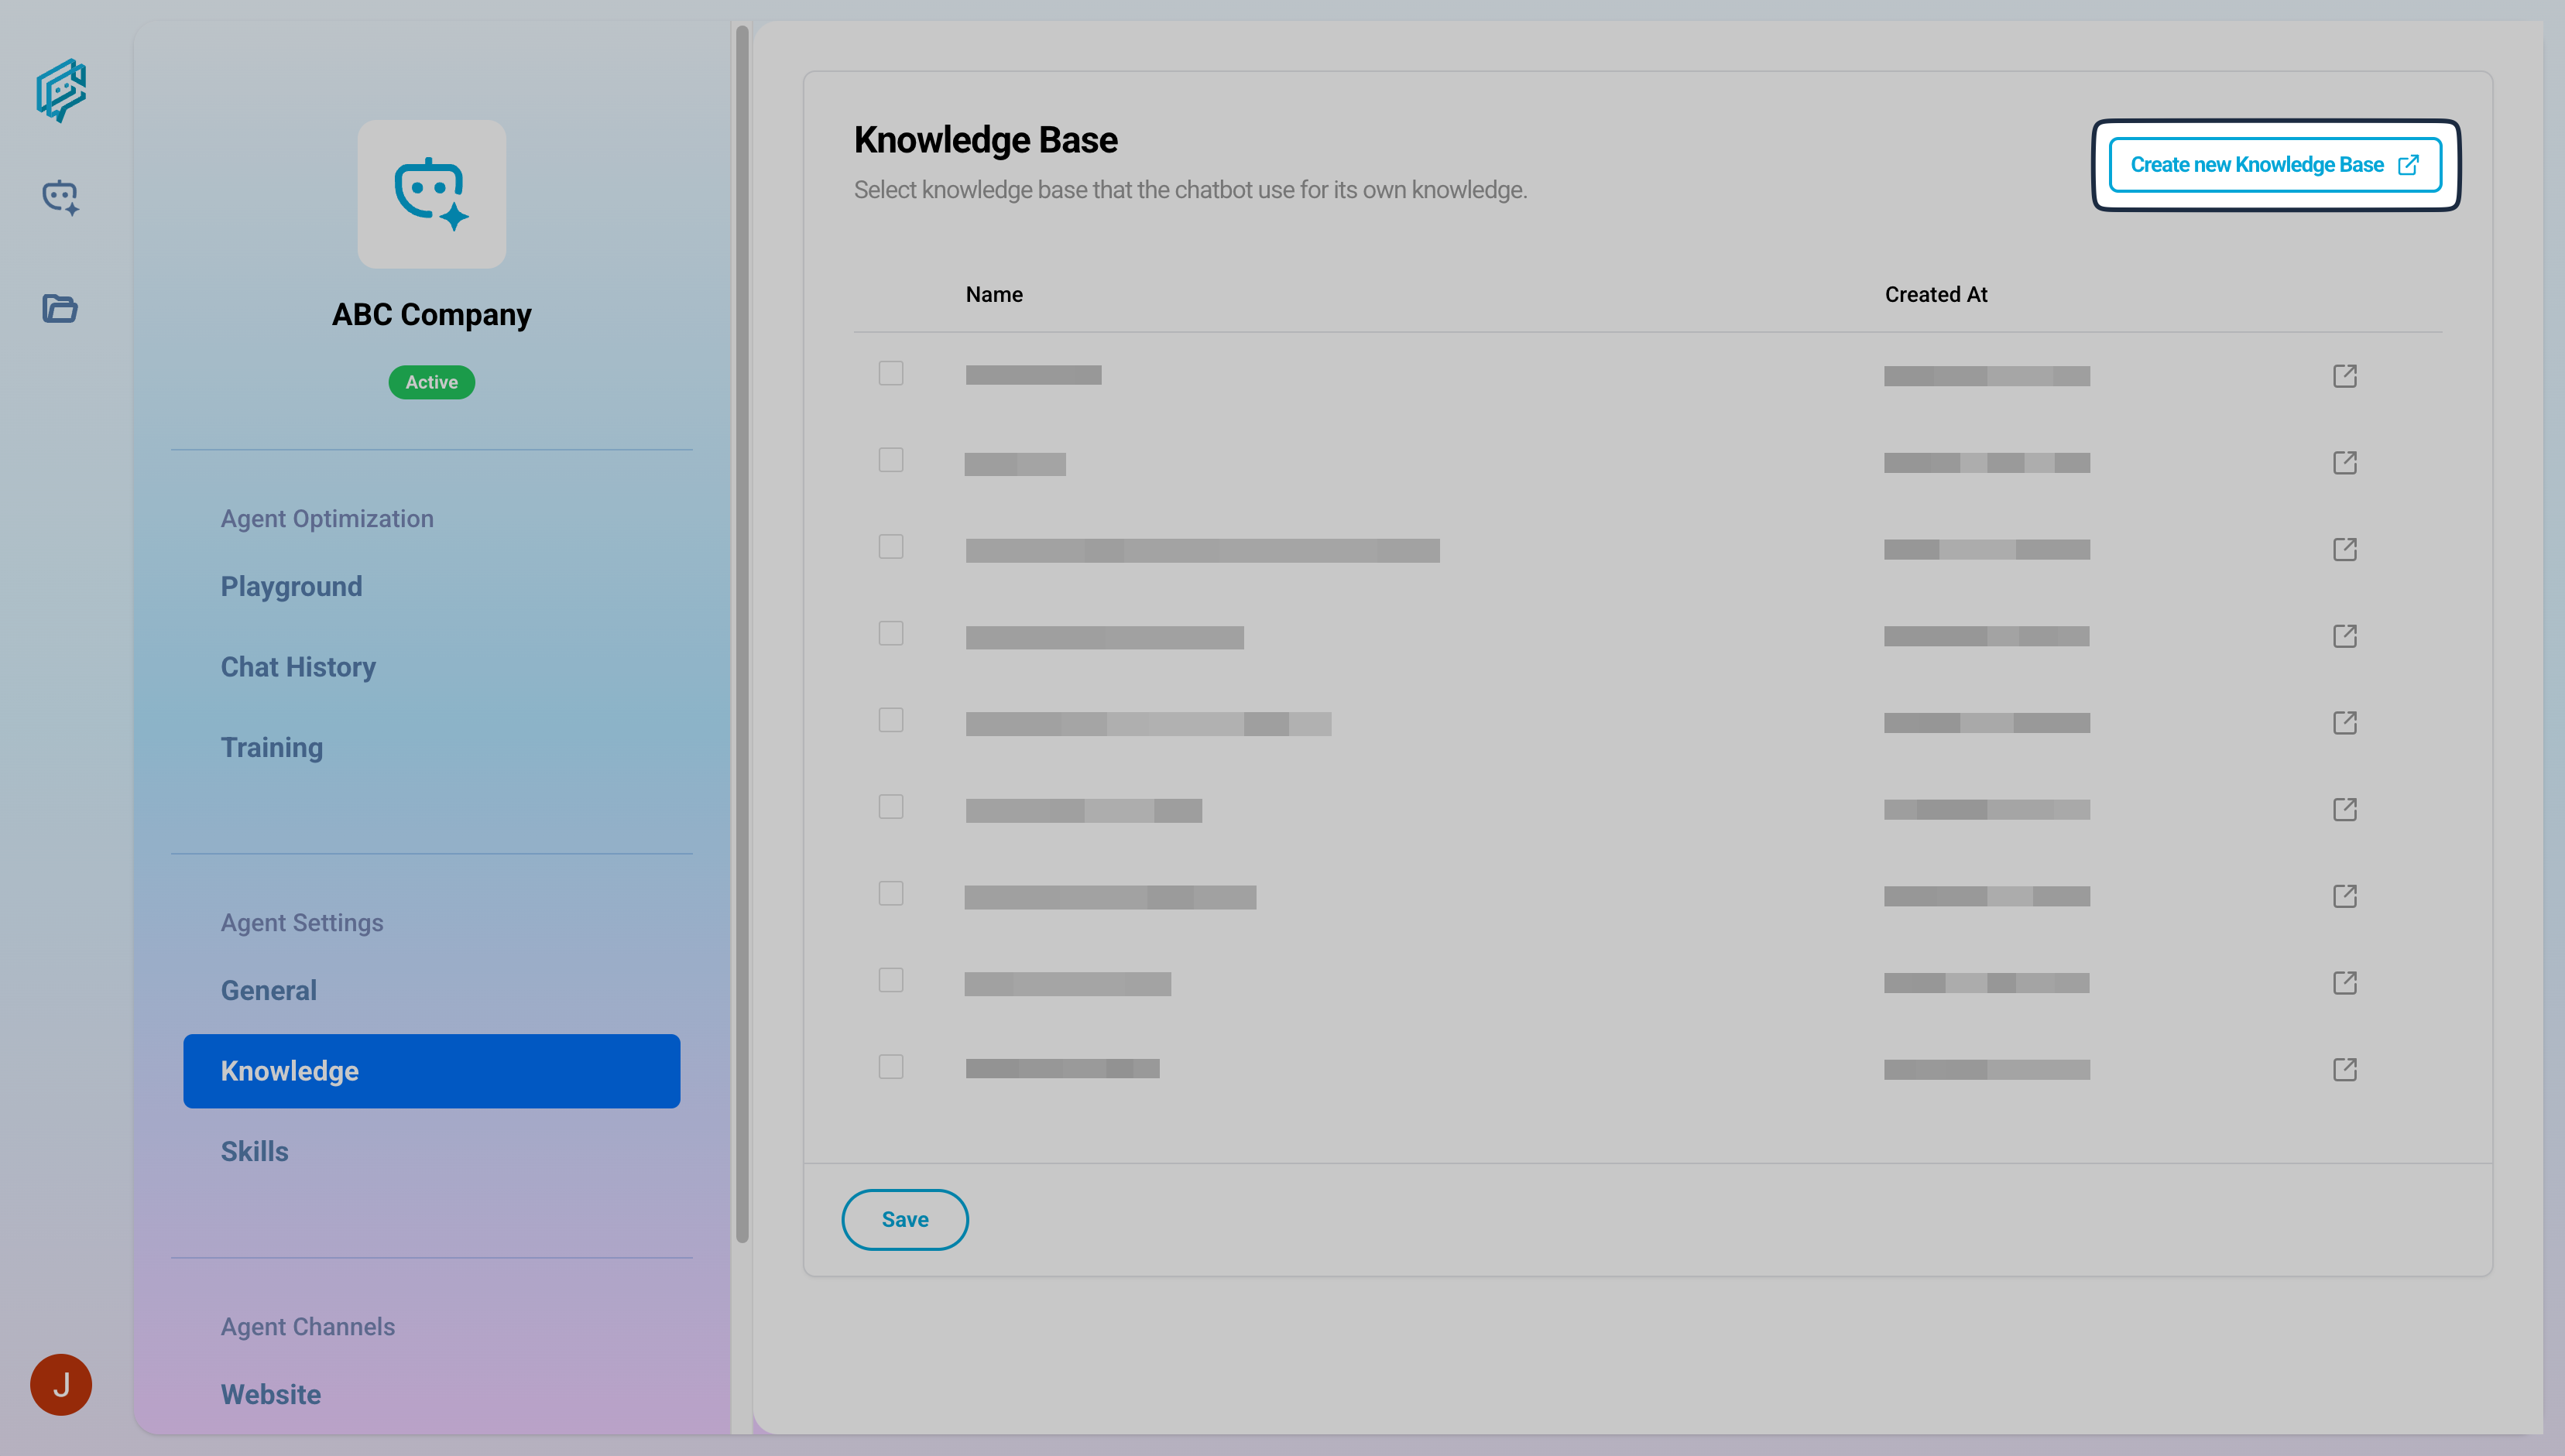
- Add a name to your Knowledge Base and click Create.
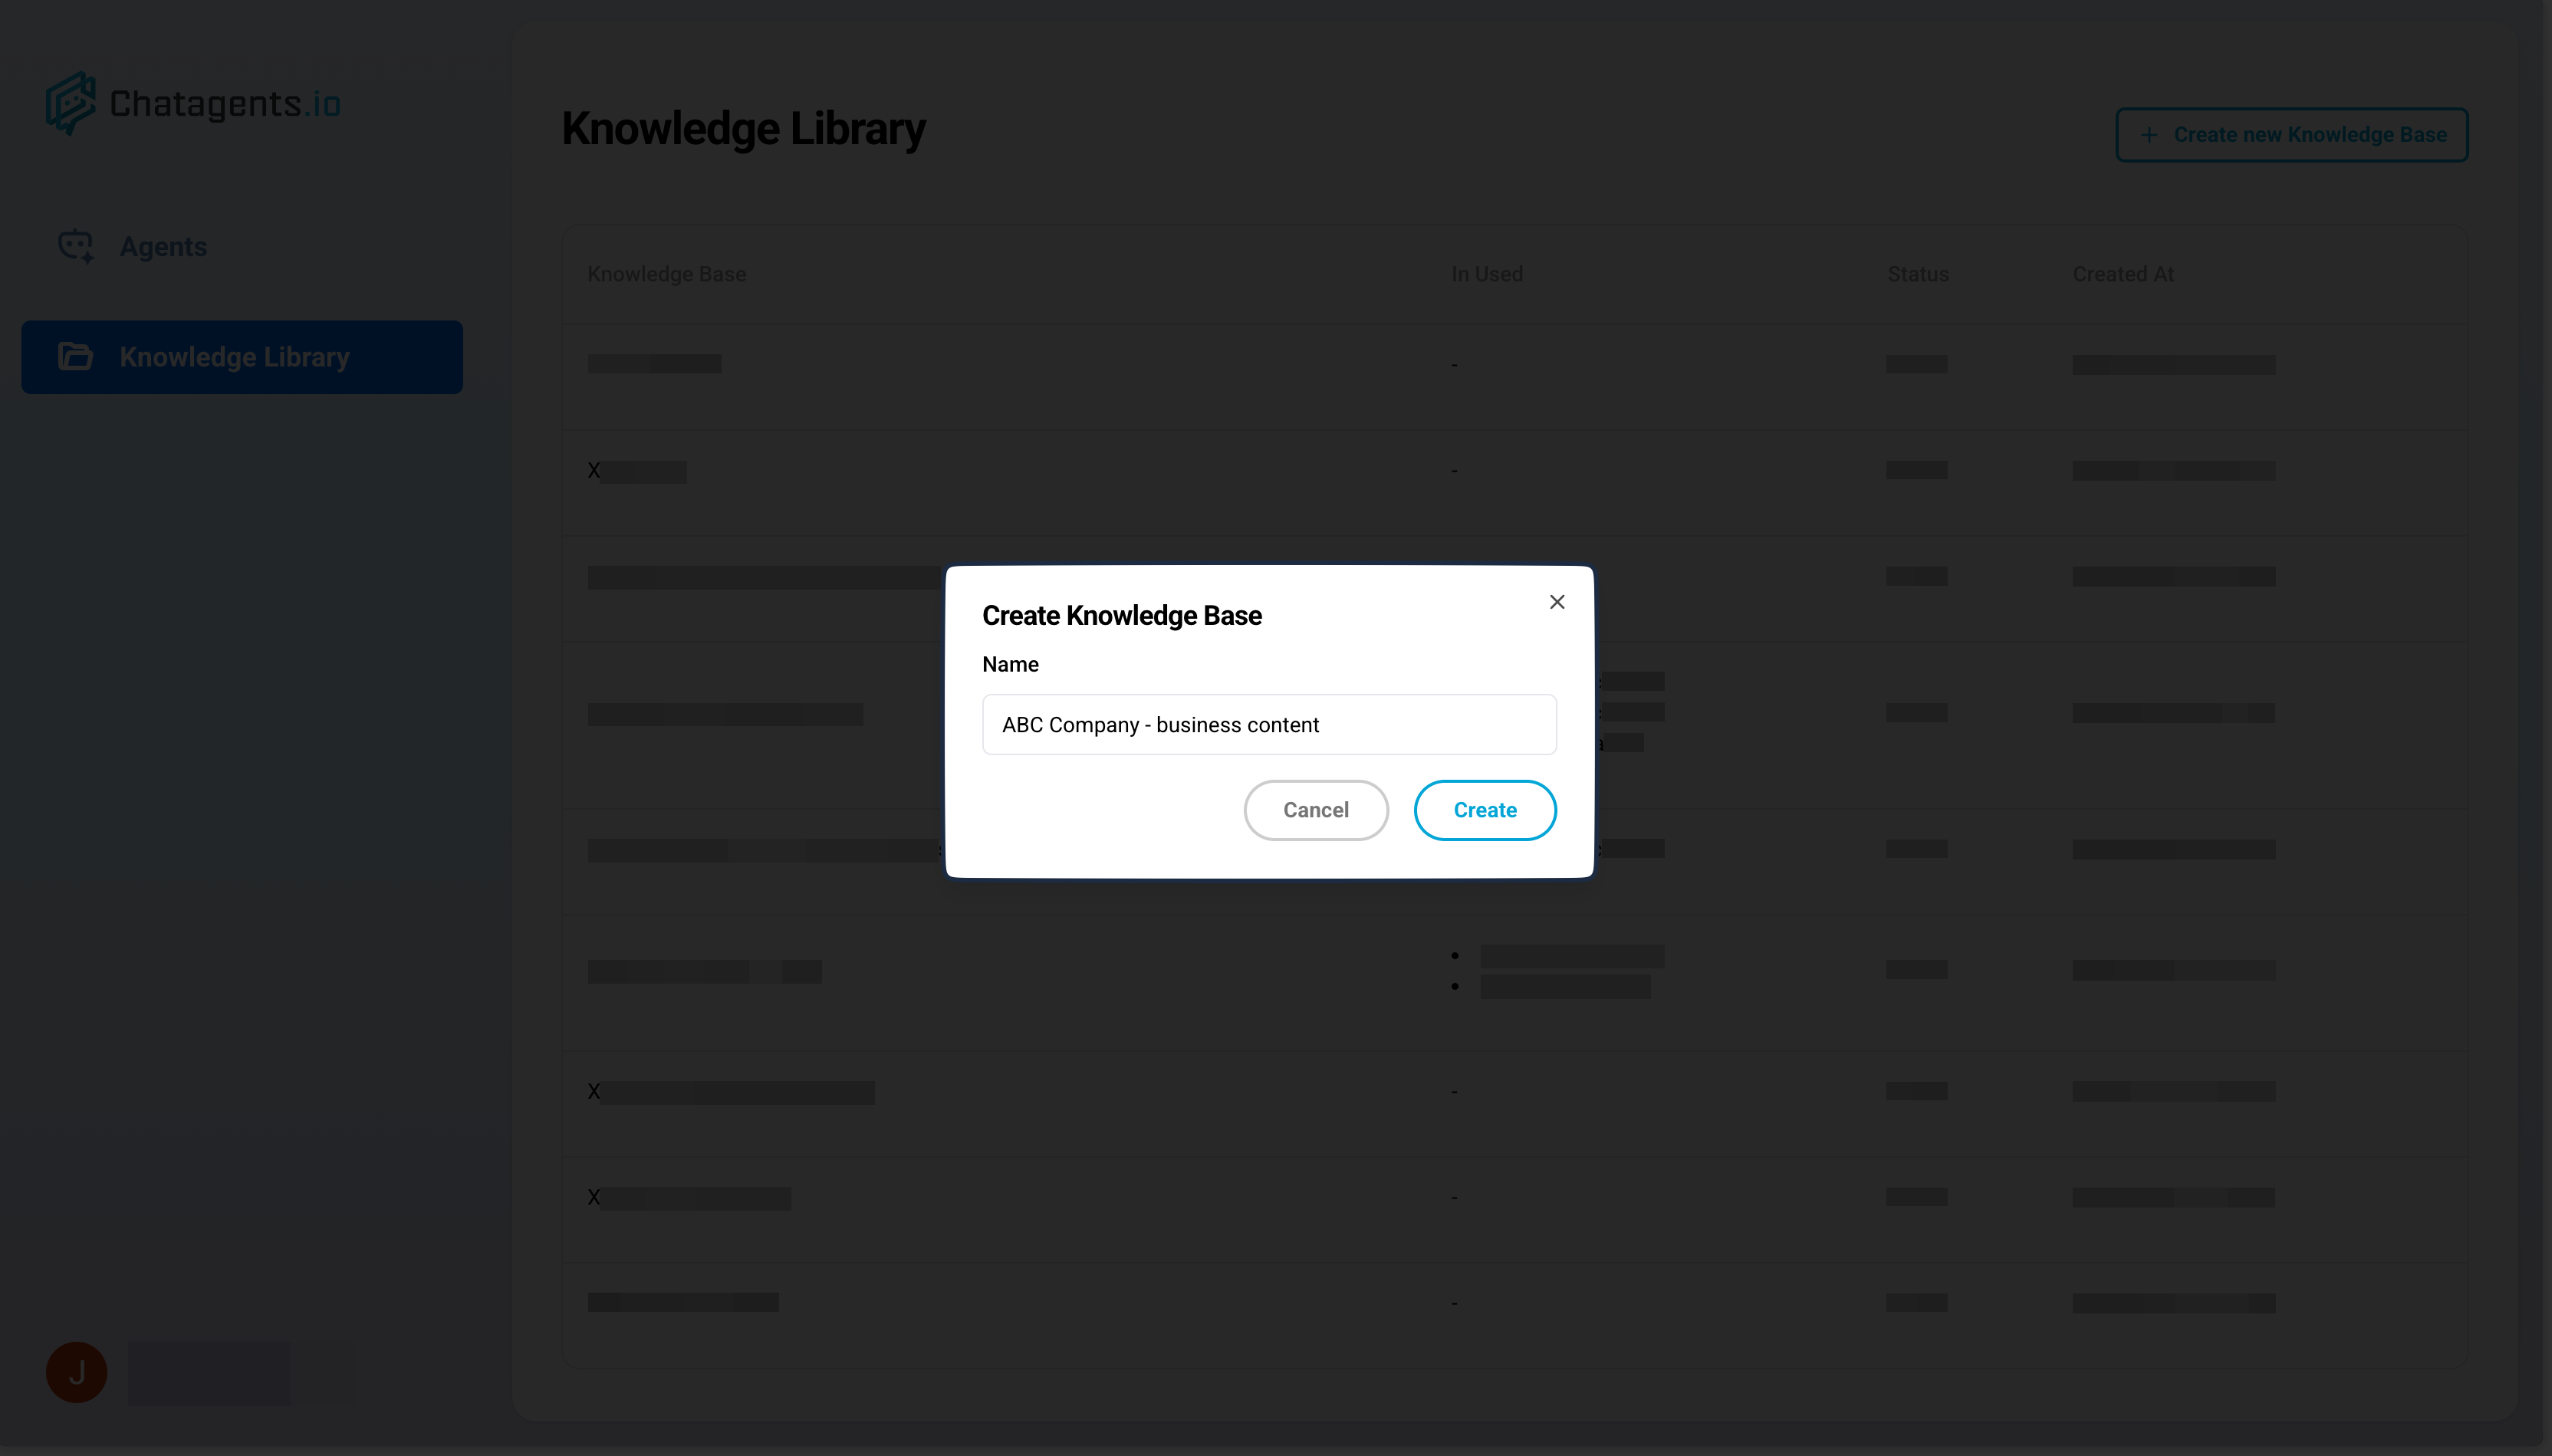
- Add your data source in 3 ways:
- Link: Add individual links, such as specific web pages, social media links, third-party pages, etc.
- Text: Add data in text form, whether it's small pieces of information or large documents.
- Website: Add entire websites. Great for quickly teaching the AI everything about your brand.
- Visit the Knowledge page.
View the full guide for adding data sources to your AI chatbot.
Method 2: Use Chat Prompts with Agent Builder
Set up using chat prompts, similar to how users chat with ChatGPT.
This is a great option if you already have premade prompts. Just copy, paste, and send!
2. Add Skills to your AI agent (optional)
Skills are your AI's superpowers!
With skills, your AI chatbot can send emails, schedule calendar events, and even interact with data from spreadsheets.
You can even combine skills into Skill Sets, which uses multiple skills into 1 workflow.
You can create skills by going to Agent Settings > Skills > Add Skill Set.
3. Train the AI with "Revised Answers"
Further refine your AI's responses to specific user messages using “Revised Answers”.
To use this function, head to Training > chat session where the message is in > Revise Answers.
4. Launch Your Agent
Publish your AI chatbot in two ways:
#1. As a chatbot widget on your website
To get started:
- In your dashboard, go to Agent Channels > Website.
- Toggle on Enable Embed.
- In the Embed Code section, click Copy.

#2. As a web page
Publish your chatbot as its own page. Use this method if you want your chatbot to be accessible on various social media and company platforms.
- In your dashboard, go to Agent Channels > Website.
- Toggle on Enable Embed.
- In the Share Link section, click Copy.

You’re all set!
Congratulations! You can now build your own personalized AI chatbot.
When you're ready, explore more of our guides to further improve your chatbot-making skills!